Demo Review: Azure Vector Search AI Assistant
This is the fourth C# demo in The RAG Demo Chronicles (Blog Series) and is the first demo so far that saves its history to a database.
This Retrieval Augmented Generation (RAG) demo is a little different than the last three because it primarily uses data from a database as the content to search instead of documents. It also uses Semantic Kernel more than other demos have, which is neat to see too.
This demo has me thinking about the many times in my career when executives or product managers have wanted a tool easy enough to use to create their own reports. Certainly, gets the ideas flowing!
Demo Details
NOTE: The demo is on the cognitive-search-vector branch
| Item of Interest | As of 2/27/2024 |
|---|---|
| Author: | 3 |
| Date created: | 5/7/2023 |
| Update within last month: | Yes |
| Link to documentation: | Project’s Readme |
| Github project link: | https://github.com/Azure/Vector-Search-AI-Assistant |
| Watching: | 10 |
| Forks: | 39 |
| Stars: | 65 |
| Knowledge needed to use: | C# Azure services |
| Prerequisites to get demo working: | Azure account Access to Azure OpenAI (apply here) If you follow my instructions below you’ll need: Git Azure CLI Docker Desktop Powershell 7 |
| Knowledge would be helpful but not required: | Blazor Server Azure services below Open AI APIs |
| Technologies Used: | ASP.NET 7 C# Blazor Minimal APIs Azure Container Apps Azure Container Registry Azure Cosmos DB Azure OpenAI Azure Storage Azure AI Search (aka Azure Search and Azure Cognitive Search) Semantic Kernel |
Demo Description
This demo is a Blazor Server web application frontend with a single web API backend. It is the first demo that saves the chat history to a database (Cosmos DB) and retrieves data such as Customer, Product and Sales Order information (not documents).
A look at the User Interface (UI)
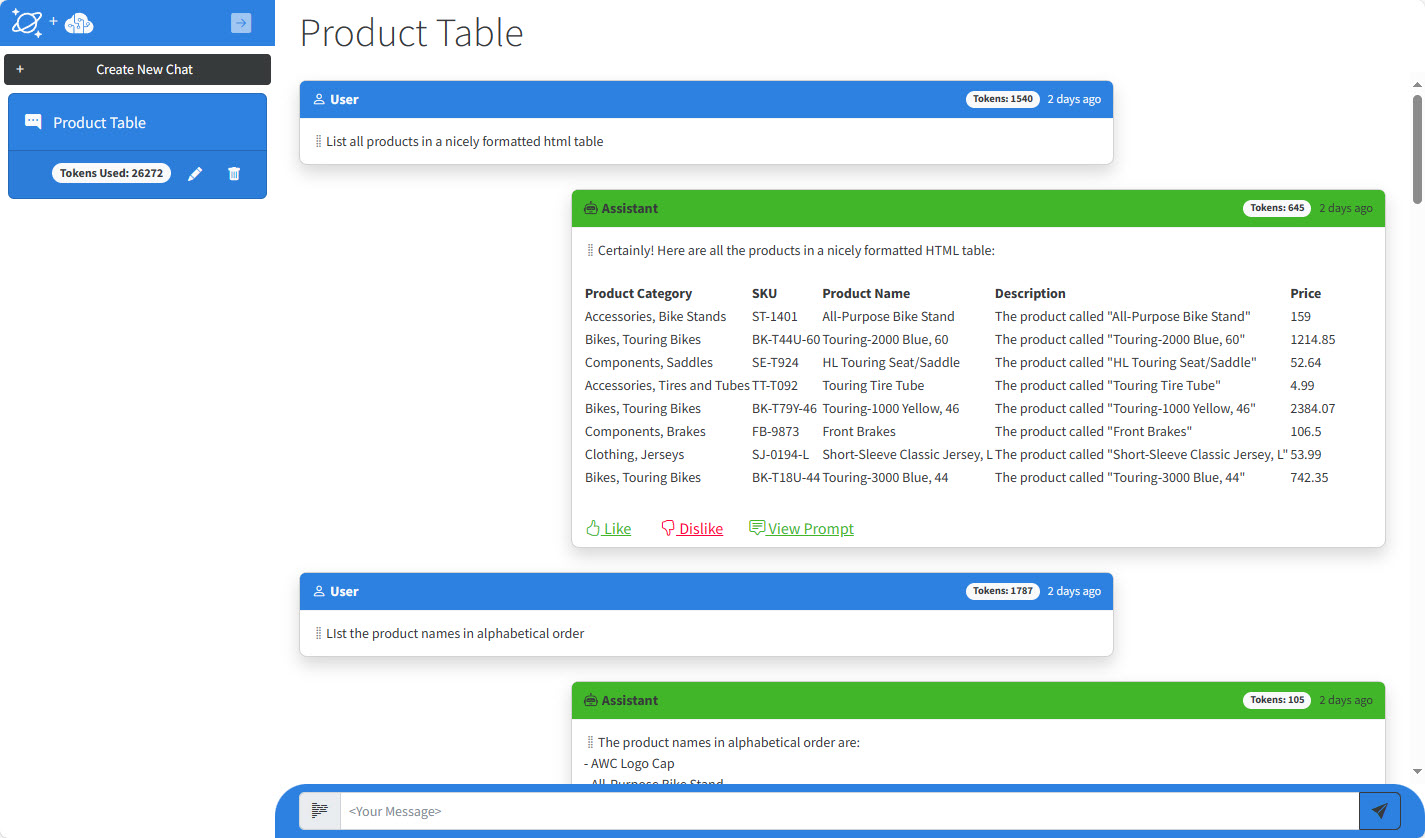
The application is a demo for a consumer retail “Intelligent Agent”. The user may be a sales representative or executive that would use it to ask questions about business data that is stored in a database and normally require a developer to create a report to surface the same sort of information. When you first load the application, you will see it looks a lot like any other chat application:
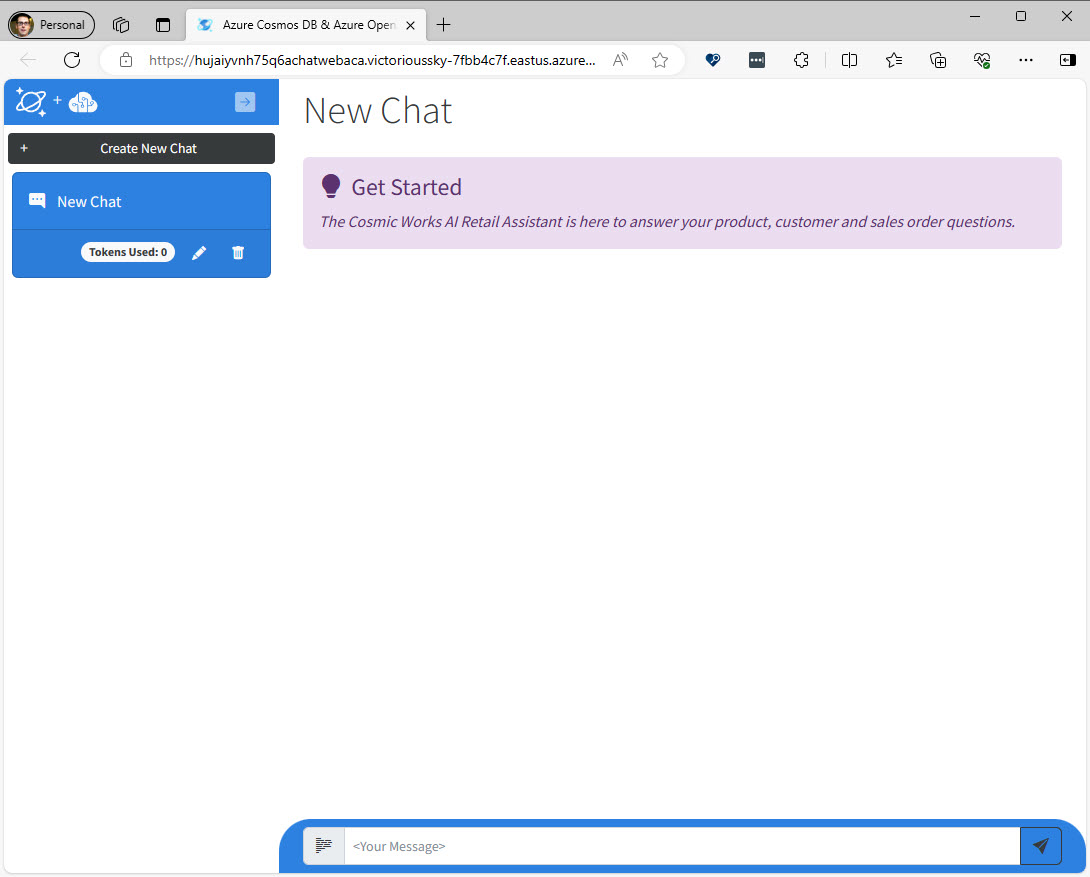
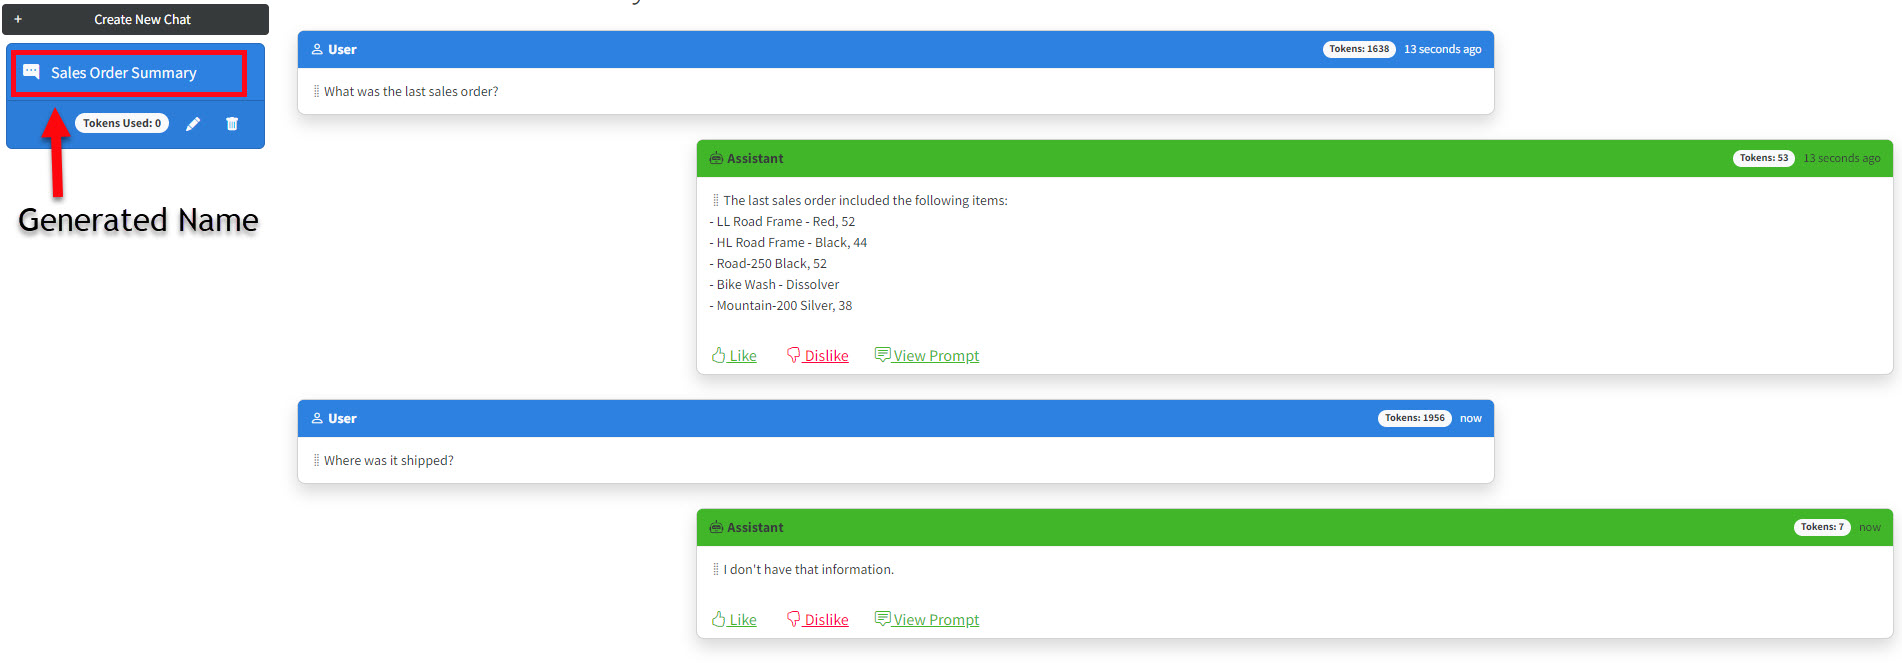
The left panel shows a list of past conversations you can load, if you have any. There is also a button to create a new chat. If you click the Create New Chat button in the upper left corner and ask a couple of questions in the message box, the application will use the content of those questions and answers to call OpenAI and generate an appropriate name for the chat and update the name in the upper right corner.
The UI mainly has three components that provide the functionality to the user and one class that provides communication with the backend API.
Components
Index.razor is the component is the container that uses the NavMenu.razor and ChatPane.razor components to provide the UI functionality. The NavMenu component has a button to collapse it to free up more screen real estate if needed. NavMenu mainly provides management of stored chats or the option to create a new one.
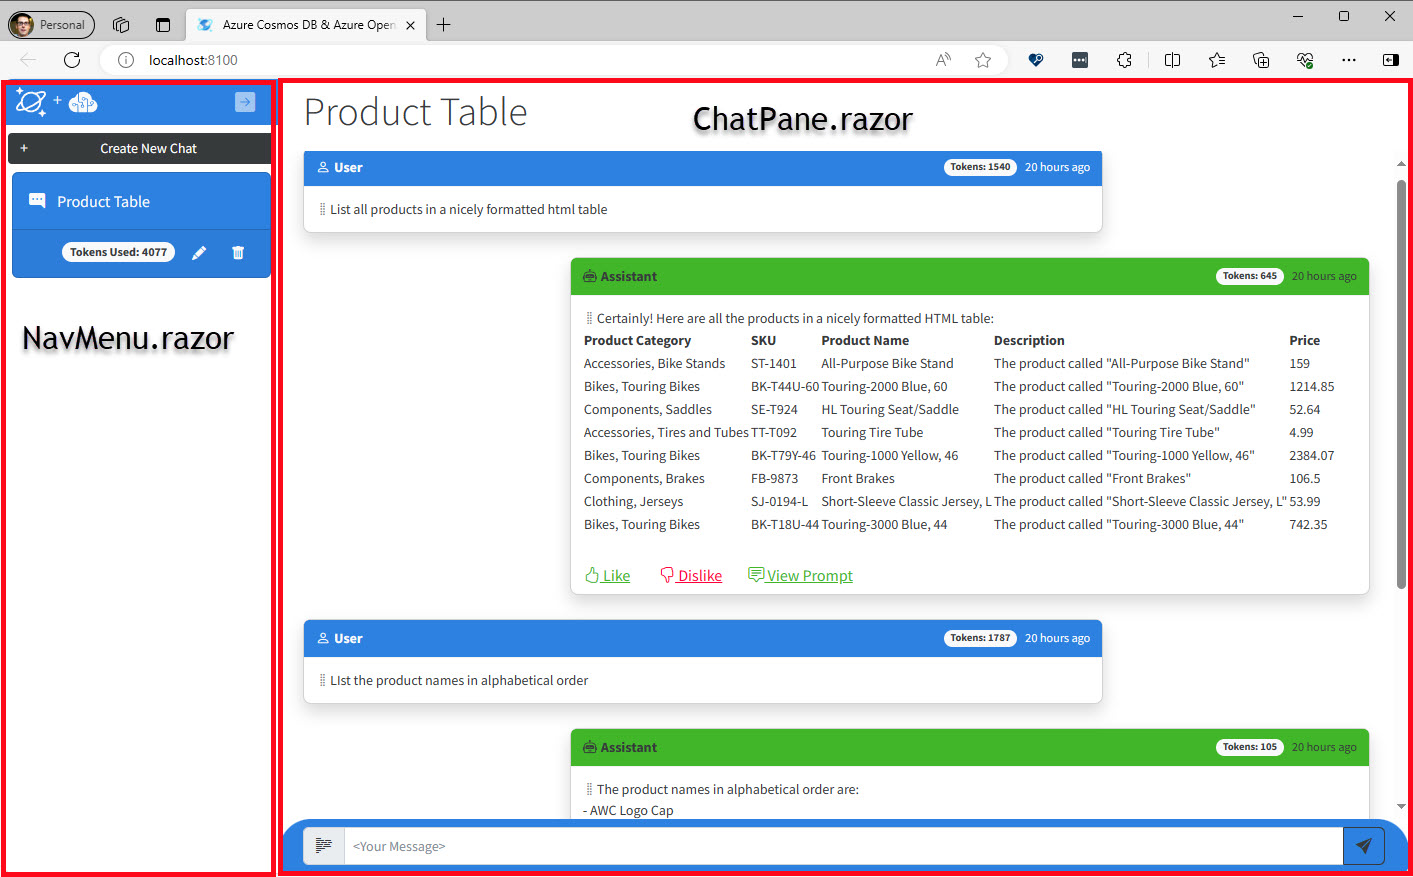
The ChatPane component provides the majority of the chat UI. Other than providing an input box to submit questions, ChatPane also provides some features typically seen on a chat application: time stamp of the question and answers as well as the ability to see the prompt. Two features we haven’t seen in the demos yet are the token count and the ability to rate (like / dislike) the answers.
ChatManager
The ChatManager.cs class is the wrapper the frontend uses to communicate with the API. Not a lot of business logic in there, it is mainly a wrapper of the API.
A look at the Backend
The backend API service is in the ChatServiceWebApi project, its main responsibility is to provide the following endpoints:
| URL | Method | Description |
|---|---|---|
| /status | GET | Provides a ready message when the API is up and initialized. It is used in the Deploy-Images-Aca.ps1 during the deployment of the code. |
| /sessions/ | GET | Gets all the chat sessions from Cosmos DB completions container. |
| /sessions/ | POST | Creates a new chat session in Cosmos DB |
| /sessions/:sessionId/messages | GET | Gets all the messages for a given sessionId from Cosmos DB |
| /sessions/:sessionId/message/:messageId/rate | POST | This is the “like” or “dislike” feature. Saves true or false to the rating field of the message for the given messageId in Cosmos DB |
| /sessions/:sessionId/completionprompts/:completionPromptId | GET | Gets a completion prompt from Cosmos DB, used when the View Prompt is clicked in the UI |
| /sessions/:sessionId/rename | POST | Renames the session for the given sessionId in Cosmos DB |
| /sessions/:sessionId | DELETE | Deletes the session for the given sessionId and all messages with the sessionId in Cosmos DB |
| /sessions/:sessionId/completion | POST | This is the chat logic. More on this below. |
| /sessions/:sessionId/summarize-name | POST | This comes from the UI when the messages in chat hits two. The existing messages are passed to this endpoint to ask OpenAI to summarize in two words. This is used to then rename the session. |
| /products | PUT | Inserts a new product into the product container in Cosmos DB** |
| /products/:productId | DELETE | Deletes a product from the product container in Cosmos DB** |
| /customers | PUT | Inserts a new customer into the customer container in Cosmos DB** |
| /salesorders | PUT | Inserts a new sales order into the customer container in Cosmos DB** |
** These endpoints are provided to show the value of using Cosmos DB in this scenario. When items are added or deleted from the product or customer containers, the logic in the CosmosDbService will update the indexes in Azure AI Search shortly after - making those changes available to the application in the chat conversation within a very short period.
Before getting to the backend logic, I want to detail the usages of Cosmos DB and Azure AI Search first.
Cosmos DB
Cosmos DB is populated at deployment time. The timing is important since the population of the Azure AI Search indexes are done with the change feed from Cosmos. If you look through the deployment Powershell you’ll notice the flow is like this:
- The API container is built and deployed to ACA (Azure Container Apps)
- The script loops until the /status endpoint returns
- The Web app container is built and deployed to ACA
- The Import-Data.ps1 script is run, which imports these two files (Customer and Product) into the Cosmos DB using the dmt tool
When the API is started and initialized, the change feed of the Cosmos DB gets a handler attached to it, so once those files above are inserted the application will add the changes to the Azure AI Search indexes as they happen.
Containers in Cosmos DB
| Name | Description |
|---|---|
| completions | List of Session, Message and Completion Prompts from the question and answer activity. |
| customer | List of customers and sales orders. From Cosmic-Works-Small Customer.json |
| product | List of products. From Cosmic-Works-Small Product.json |
Azure AI Search
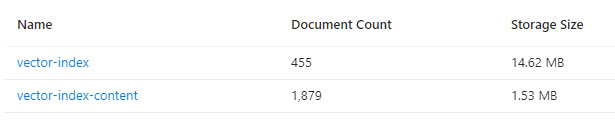
The application creates two indexes in Azure AI Search: vector-index and vector-index-content. If you take a look at the indexes panel in the Azure Portal, you’ll notice the sizes are quite different - even once the application has just been deployed and initialized. This gives a hint as to how the two indexes are used differently.
vector-index
This index is similar to other demos I’ve reviewed - except instead of chunks from pdfs or files it holds string representations of data from the Cosmos DB product and customer containers. Also like the other demos, this index has embeddings.
In the chat logic, this index is searched as the long term memory using a Semantic Kernel (SK) connector.
vector-index-content
This index does not have embeddings and is used for a faceted search when populating the short term memory used as a SK MemoryStore. Details on the faceted search are in the ACSMemorySourceConfig.json file. This is the contents of that file:
{
    "FacetedQueryMemorySources": [
        {
            "Filter": "entityType__ eq 'Product'",
            "Facets": [
                {
                    "Facet": "categoryName,count:0",
                    "CountMemoryTemplate": "In the product category named \"{0}\", the Cosmic Works Bike Company sells a total number of {1} products."
                }
            ],
            "TotalCountMemoryTemplate": "The Cosmic Works Bike Company sells a total number of {0} products."
        }
    ]
}
NOTE: the Filter is the the string that gets passed to the search service.
Blob Storage
Blob storage is used to hold some configuration files as well as files that get chunked and added to short term memory with their embeddings. The files that get chunked and loaded into short term memory are configured in the BlobMemorySourceConfig.json file. This is the contents of that file indicating two text files should be loaded:
{
    "TextChunkMaxTokens": 250,
    "TextFileMemorySources": [
        {
            "ContainerName": "product-policy",
            "TextFiles": [{
                    "FileName": "return-policies.txt",
                    "SplitIntoChunks": true
                },
                {
                    "FileName": "shipping-policies.txt",
                    "SplitIntoChunks": true
                }
            ]
        }
    ]
}
All the above files are under the /MemorySources directory. There are also config files in the /SystemPrompts directory, which will be mentioned later.
The backend logic is mostly centralized in two places: ChatService.cs and SemanticKernelRAGService.cs.
ChatService
If you take a look at the ChatEndpoints.cs file in the ChatServiceWebApi project, you will see all the endpoints use the ChatService to perform their work. The ChatService uses both the CosmosDbService.cs and SemanticKernelRAGService.cs to provide its functionality. Most methods are small wrappers around Cosmos DB data access and not that interesting.
The Status() method is used in the deployment process and returns the ready or initializing statuses of the system.
SummarizeChatSessionNameAsync() is the functionality that will create a two word summary for the given session’s prompt and make the call to Cosmos to update the name in the database.
AddPromptCompletionMessagesAsync() is where the session’s TokenUsed property count is incremented after each chat question/answer. It is also where the promptMessage, completionMessage and completionPrompt are saved in Cosmos DB.
The GetChatCompletionAsync() method, is the where the chat question and answer starts. This method takes in the sessionId and the userPrompt (this is the messaged typed in the input on the UI), since this application keeps the messages in the database, there is no need for the UI to keep track of all the messages and pass them to the server side. The first thing this method does is get all the messages for the current session from Cosmos. After that it calls the SemanticKernelRAGService.GetResponse() method with the user prompt and all the previous messages. When it returns, it does a little housekeeping, saves the response information to Cosmos and returns to the UI.
SemanticKernelRAGService
This service is where the majority of the chat logic is provided. As mentioned earlier, this application uses Semantic Kernel (SK). In Demo Review: Azure Search Open AI Demo C# we saw SK being used to simplify creating text embeddings and chat completion. The SemanticKernelRAGService goes further using SK.
In the constructor the SK builder is configured for both the text embeddings and chat completion, like the other demo. However, it also sets up memory stores for long term memory (backed by the SK AzureCognitiveSearchMemoryStore) and short term memory (backed by the SK VolatileMemoryStore.
In the GetResponse() method it first checks to see if the short term memory has been initialized - this is a cache priming step (and what causes a lag when you ask the first question). If it has not been initialized, then it uses the injected memorySources to populate the short term memory. If you look at the Program.cs file you can see there are two configured: AzureCognitiveSearchMemorySource and BlobStorageMemorySource - notice those are both in the project code, so check them out if you are interested in more detail.

The long term and short term memory stores are used to configure a custom SK plug: TextEmbeddingObjectMemoryPlugin. This plugin wraps the searching of the long and short term memories for the given user prompt. In the RecallAsync() method, it gets the embeddings for the user prompt. Once the embeddings for the user prompt have been retrieved, then the search against the Azure AI Search index is done in the long term memory. Since the index has embeddings, the similarity search can be completed in the Azure AI Search service. The short term memory is only in memory and not in the Search index - so it is the SK memory store that provides the similarity search with the embeddings capability. That is pretty cool.
Once the memories have been searched, the results are used with the ChatBuilder utility class. This builder organizes quite a few things about the request we want to make to OpenAI. Let’s go through what is going on in this setup, this is the code for the ChatBuilder:
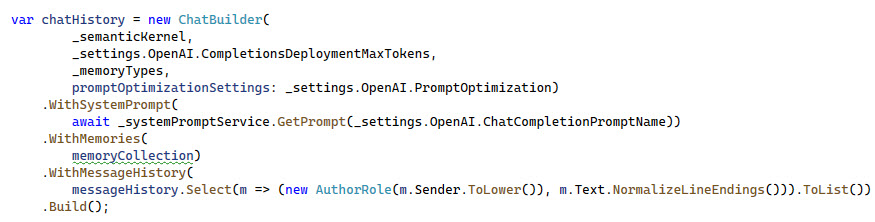
- _semanticKernal - this is the instance of the configured SK
- _settings.OpenAI.CompletionsDeploymentMaxTokens - maps to the value 8096 in the appsettings.json file
- _memoryTypes - is the Customer, Product, SalesOrder and ShortTermMemory items from
ModelRegistry.cs - promptOptimizationSettings - is a set of 7 properties from the appsettings.json file used in optimizing the prompt size (more on this soon).
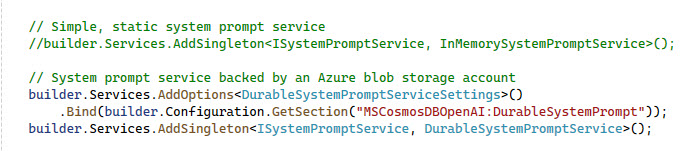
Small diversion here but I think this abstraction is pretty useful. The WithSystemPrompt() method uses the injected ISystemPromptService, the codebase has two implemented: DurableSystemPromptService and InMemorySystemPromptService. By default the demo uses the DurableSystemPromptService which is injected in the Program.cs file.s
The DurableSystemPromptService uses files stored in blob storage. The container is configured in the appsettings.json file
"DurableSystemPrompt": {
  "BlobStorageContainer": "system-prompt"
}
This system-prompt container has the files mentioned above in the Blob Storage section - in the codebase they are under the /SystemPrompts directory. There are 3 system prompts provided:
- RetailAssistant/Default.txt - this is the default system prompt used for chat messages. It is set in the appsettings file with the setting
"ChatCompletionPromptName": "RetailAssistant.Default" - RetailAssistant/Limited.txt - this is a secondary system prompte that is not used by default.
- Summarizer/TwoWords.txt - this is the system prompt used when getting a summary for the name of the session messages and is set in the appsettings.json file with the setting
"ShortSummaryPromptName": "Summarizer.TwoWords"
Back to the ChatBuilder … the WithMemories() method cleans up all the memories that were returned earlier for passing in the chat request.
WithMessageHistory() sets the history items to be used in the Build() method.
The Build() method first calls the OptimizePromptSize() method which implements the strategy to shortening the prompt messages, history and/or memories if there are token size problems. The kernel is used to create a new ChatHistory object, then the system prompt is built and the history messages are added and returned.
At this point the SemanticKernelRAGService takes the chatHistory and adds the original userPrompt text passed in and calls OpenAI to get the question answered.
Once OpenAI returns, the message is then passed back to the UI.
How I got it up and running
In case you want the more official way to do it (or just more details), the repo also has deployment notes to help you.
Of all the demos I’ve reviewed so far, this one needs a little more tweaking to get up and running - so be patient. This demo does not use the Azure Developer CLI, so we must go old school and use the regular az (Azure CLI) and Powershell.
NOTE: If you haven’t already, you will need to be approved for the Azure OpenAI services on your Azure subscription before getting it up and running. Apply Here - it usually takes around 24 hours to get approved.
Due to the application being deployed to a Azure Container Apps (or Azure Kubernetes Service), two containers will get built when the Powershell script runs this requires Docker Desktop to be running. If you don’t have it, you will need to install it.
- Clone the repo to your local drive
- Open VS Code and a PowerShell terminal (or open command line to demo’s root directory to run AZ)
- Use git to check out the cognitive-search-vector branch (
git checkout cognitive-search-vector) or change branches in VS Code - Start docker desktop, if it isn’t already running
If you know your azure subscription id you can skip #5 and #6
- Run
az auth --use-device-codeand login to your Azure subscription that is approved for Azure OpenAI. - Run
az account list -o tableto get a list of your subscriptions, copy the subscription id you are going to deploy to
Make sure you are at the root of the project
- Run
./scripts/Unified-Deploy.ps1 -resourceGroup <resourceGroupYouWantCreated> -location <locationToCreateOpenAIResource> -subscription <subscriptionId from #6 above> - When a browser pops up, login to Azure (if you did #5 this will be the second time - but if you know your subscription id the just the first)
The output of the Powershell is useful if you run into any problems.
The whole process took around 10 - 20 minutes to deploy. The search indexes will take a few more minutes to populate once the container apps are up and running.
When the deployment is complete you should see a web app URL close to the bottom of the output in the terminal:

You can also get the URL of both container apps by running az containerapp list -o table
Navigate to that site to verify your demo deployed and is working.
NOTE: Do not forget these resources will be costing money
To remove everything, you can run az group delete --name <resource group name> to delete all the resources. It will take 15 - 20 minutes. After that is completed, if you want the Azure Open AI quota freed immediately - you will need to purge the Open AI deleted resource. If you don’t purge it, the quota will free up in 2 days.
Purge a deleted Azure Open AI Resource
- Login to the azure portal
- Type in OpenAI in the search box and select it in the list.
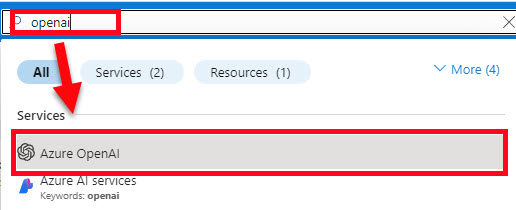
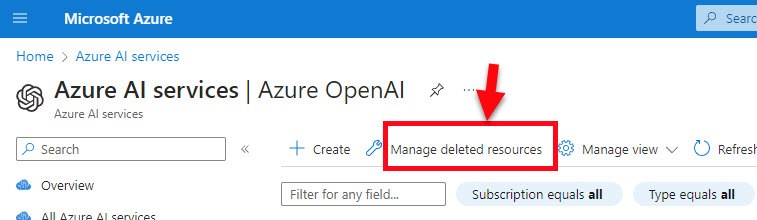
- Click on the Manage deleted resources button at the top
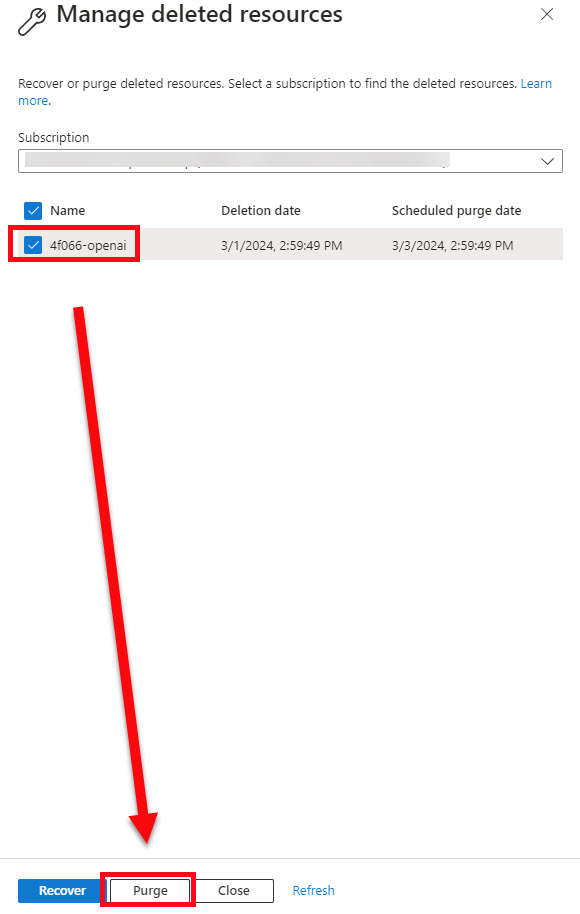
- In the side panel, select your subscription (if you have multiple), check the Open AI resource, and click the purge button at the bottom.
Points of Interest
These are some points in the demo that are RAG feature related and you may revisit later when you start creating your own RAG applications.
Storing vector embeddings in Azure AI Search
This demo uses Azure AI Search for storing string representations of Customer, Product and Sales Order objects in a search index with the vector embeddings.
Storing chat conversations in database
This demo keeps the conversation history in a Cosmos DB. This is useful for using in the chat messages to provide more context to OpenAI as well as a nice feature of the application to have history from previous sessions.
Strategy for optimizing prompt size
In the ChatBuilder utility the OptimizePrompSize() method makes a few passes through the memories, messages and system prompt calculating the token sizes and trimming excess where it can. This is the first demo I’ve found that implements this type of logic - I can see how using more history and context messages could cause the prompt to grow larger than desired. If you are having problems with prompts being too large, you may want to take a look at this method.
Semantic Kernel sage
Semantic Kernel is a workflow framework that help interact with Large Language Models (like OpenAI). A lot of the interaction with API’s is abstracted out, leaving your code cleaner than if you write it all from scratch.
The SemanticKernelRAGService constructor sets up the kernel which is then used in the GetResponse() method. Take a look at that code if you want to get started with the semantic kernel.
Text chunking
The BlobStorageMemorySource on line 45 uses the SK TextChunker to split text into chunks. If you are looking for a way to split your text and not write your own method (like all the other demos have), this is a great place to start.

Calculating embeddings on only marked properties of an object
The EmbeddingFieldAttribute and EmbeddingUtility are interesting in how they provide the ability to decorate properties of models that you want to be included in the text used to create embeddings for give data model. Notice in the example below how the type and details properties have the [EmbeddingField] attribute on them:
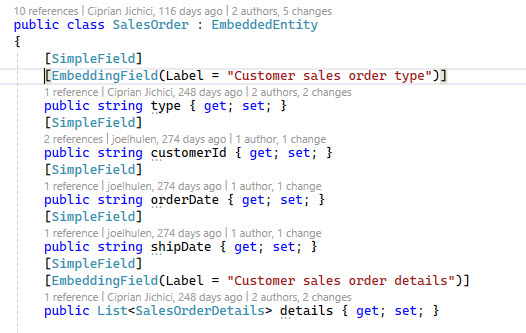
The EmbeddingUtility has a few utility methods on it that will return JObjects that only have the properties that have been decorated with the [EmbeddinngField]. If you find that you need to save embeddings for data objects and are looking for ways to only include specific properties in the semantic search, you may want to check out these two classes.
Other resources
Other related demos
- Azure Search OpenAI Demo C#
- Demo Review: Simple RAG using Blazor, SQL Server and Azure OpenAI
- Demo Review: Simple RAG using SQL Server, OpenAI and Function Calling
If you have a comment, please message me @haleyjason on twitter/X.