Demo Review: Azure Search OpenAI Javascript/Typescript
This is the second in the family of Azure Search OpenAI demos that I’m reviewing. Last week I reviewed the C# version. As you’ll see below, the Javascript version is a bit different.
The user interface (UI) functionality is provided by a set of web components that you can add to about any web application (ie. React, Angular, Vue, etc.) - in fact the web application in the demo is written in React. Also the chat communication is written to match the HTTP protocol for AI chat app which means the frontend can communicate with any backend that matches that protocol.
In demos #1 and #2 we saw basically the same codebase, but two approaches to the question/answer flow of the system - this demo has three approaches. One of the approaches uses LangChain agents which is similar to the function/tools approach we saw in demo #2.
Demo Details
| Item of Interest | As of 2/19/2024 |
|---|---|
| Author: | 8 Contributors |
| Date created: | 8/27/2023 |
| Update within last month: | Yes |
| Link to documentation: | Project’s Readme |
| Github project link: | https://github.com/Azure-Samples/azure-search-openai-javascript |
| Watching: | 5 |
| Forks: | 43 |
| Stars: | 125 |
| Knowledge needed to use: | Typescript Azure services |
| Prerequisites to get demo working: | Azure account Access to Azure OpenAI (apply here) Git (if you follow my instructions) Azure Developer CLI (if following my instructions below) Docker Desktop (if following my instructions below) |
| Knowledge would be helpful but not required: | TypeScript Node Lit Vite React Fastify Azure services below Open AI APIs |
| Technologies Used: | Node 18 NPM 9 TypeScript 5 Fastify Lit Vite React Azure Static Web Apps Azure Container Apps Azure Container Registry Azure OpenAI Azure Storage Azure AI Search (aka Azure Search) LangChain |
Demo Description
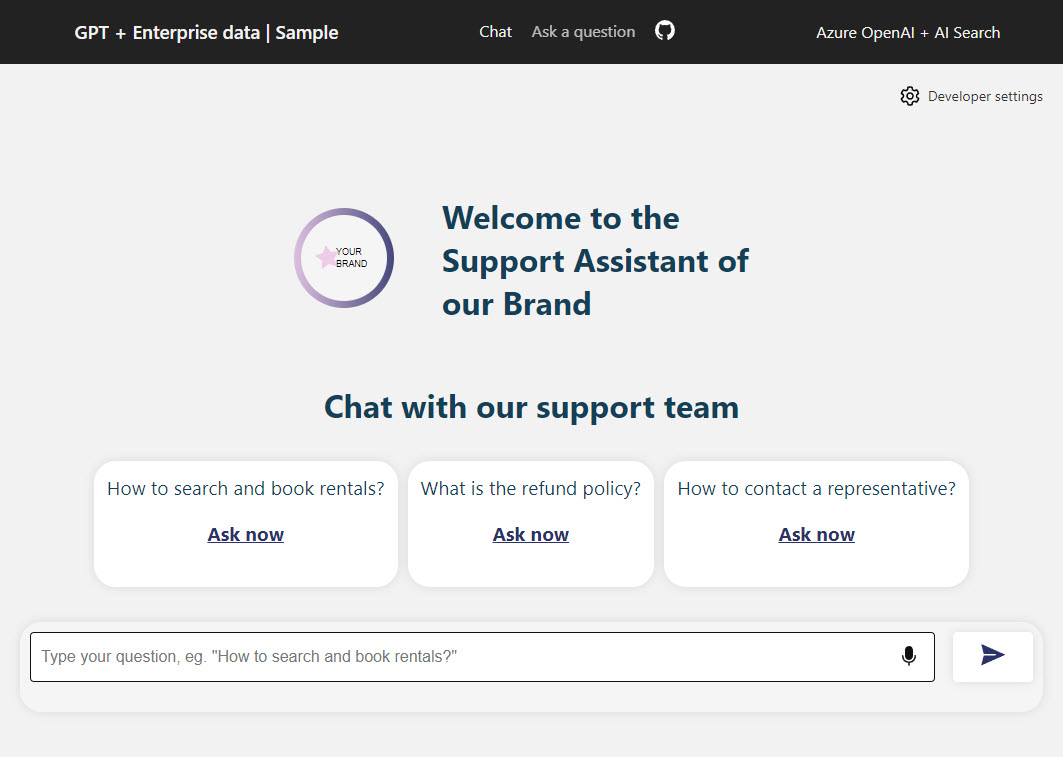
This demo code has a very flexible design that encapsulates the chat functionality in web components and communicates over a predefined chat protocol so the backend is also easy to change out for another implementation. Below is a screenshot of the landing page.
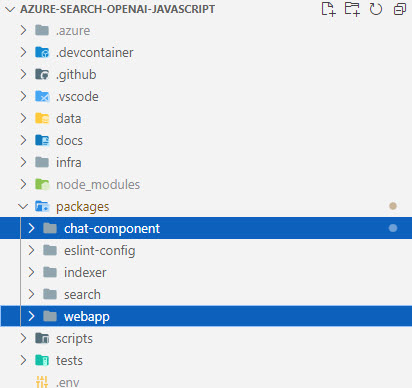
The functionality for this demo is in the five directories under the packages directory. The eslint-config is just global configuration for the linter (I won’t be covering this). The interesting logic is in the other four directories.
A look at the User Interface (UI)
The user interface is split between the chat-component and webapp directories.
chat-component
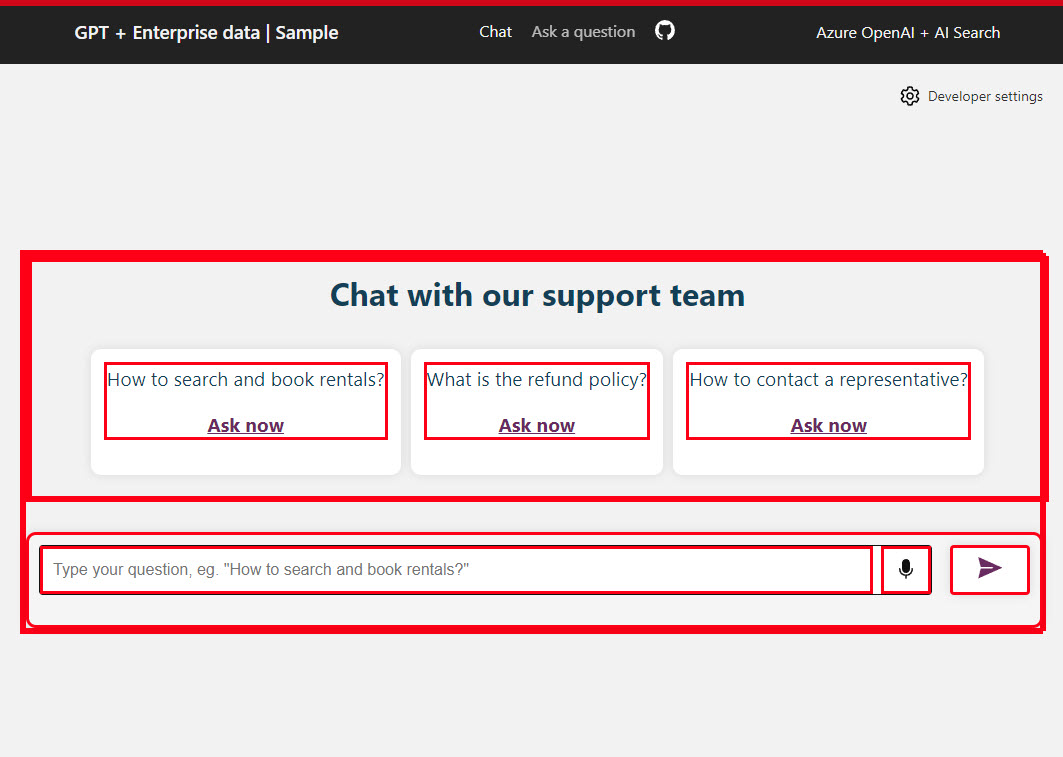
This directory houses the web component that encapsulate the majority of the client-side chat logic. In order to give you a feel for how much functionality is contained in these components, I added a border to each element so you can see them in the screenshot below:
NOTE: I personally have never written reusable web components - so forgive me if my terminology is off here (my experience is mostly with Angular).
In this directory, there are a few types of files:
- Elements - simple html UI with databinding
- Controllers - wrappers of client side logic and server communication logic
- Components - html UI with logic, event handlers. They utilize components and controllers to aggregate UI functionality
Overview of the files:
| Name | Type | Description |
|---|---|---|
| chat-action-button | Element | A custom element that wraps a button. |
| chat-stage | Element | A custom element that shows as the branding header. |
| citation-list | Element | A custom element that databinds a list to an array of Citation objects (defined in types.d.ts in the src directory). It also dispatches a click event for the citations (handled in the chat-component) |
| document-previewer | Element | A custom element that either shows markdown as html or wires an IFRAME to show a given URL. |
| link-icon | Element | A custom element that wraps and anchor tag and icon |
| loading-indicator | Element | A custom element used in a few locations that wraps a spinner icon to show while waiting for a server response |
| voice-input-button | Element | A custom element that wraps the browser’s speech recognition capabilities (if available). |
| chat-controller | Controller | Provides the communication to the server and shapes the returning data as needed for the components to databind to UI |
| chat-history-controller | Controller | Provides the saving and retrieving of chat history to local storage |
| chat-component | Component | A custom element that uses other custom elements and controllers to provide functionality to ask questions and get answers from the server. This is the biggest portion of UI functionality. |
| chat-thread-component | Component | A custom element that shows the chat messages, citations and follow-up question listings. |
| tab-component | Component | A custom element providing tab functionality used for tab navigation functionality |
| teaser-list-component | Component | UI layout component used in the chat-component. Its like the citation-list but it has clickable UI elements |
webapp
This is a React web application that uses the chat-component above as a dependency. The web app basically just captures the developer settings panel data and provides the shell layout around the web components.
A couple of things to point out are the Chat or Ask a Question tab at the top and the Developer Settings.
Chat or Ask a Question
Two question/answer approaches are available without modification in the UI with the Chat or Ask a Question links at the top:

By default the Chat approach is selected. This means the Chat.tsx will be shown. If you select the Ask a Question link, the OneShot.tsx will be shown. There are a couple of things to note about their different features. The first thing is, only the Chat.tsx uses the streaming option, custom styles, branding and theme. So if you are looking to mimic those types of features, that may be important to you.
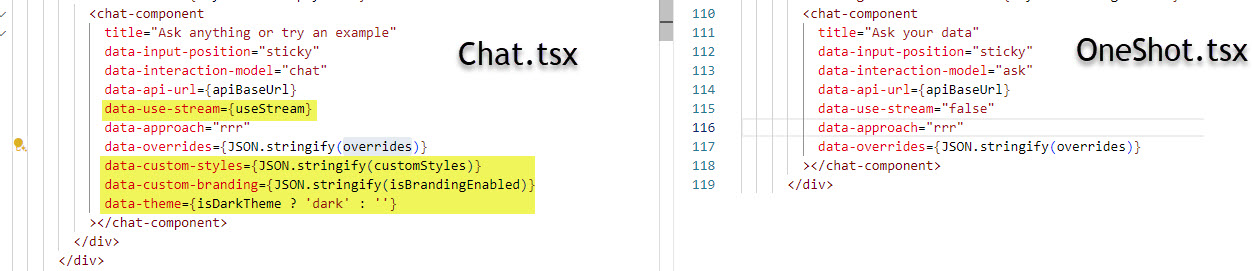
The second difference is their approach implementations. Those are determined by the data-approach attribute on the chat-component element. More on these different approaches in the next section on the search.
Developer Settings
In the upper right corner there is a button you can use to open the developer settings (shown below):
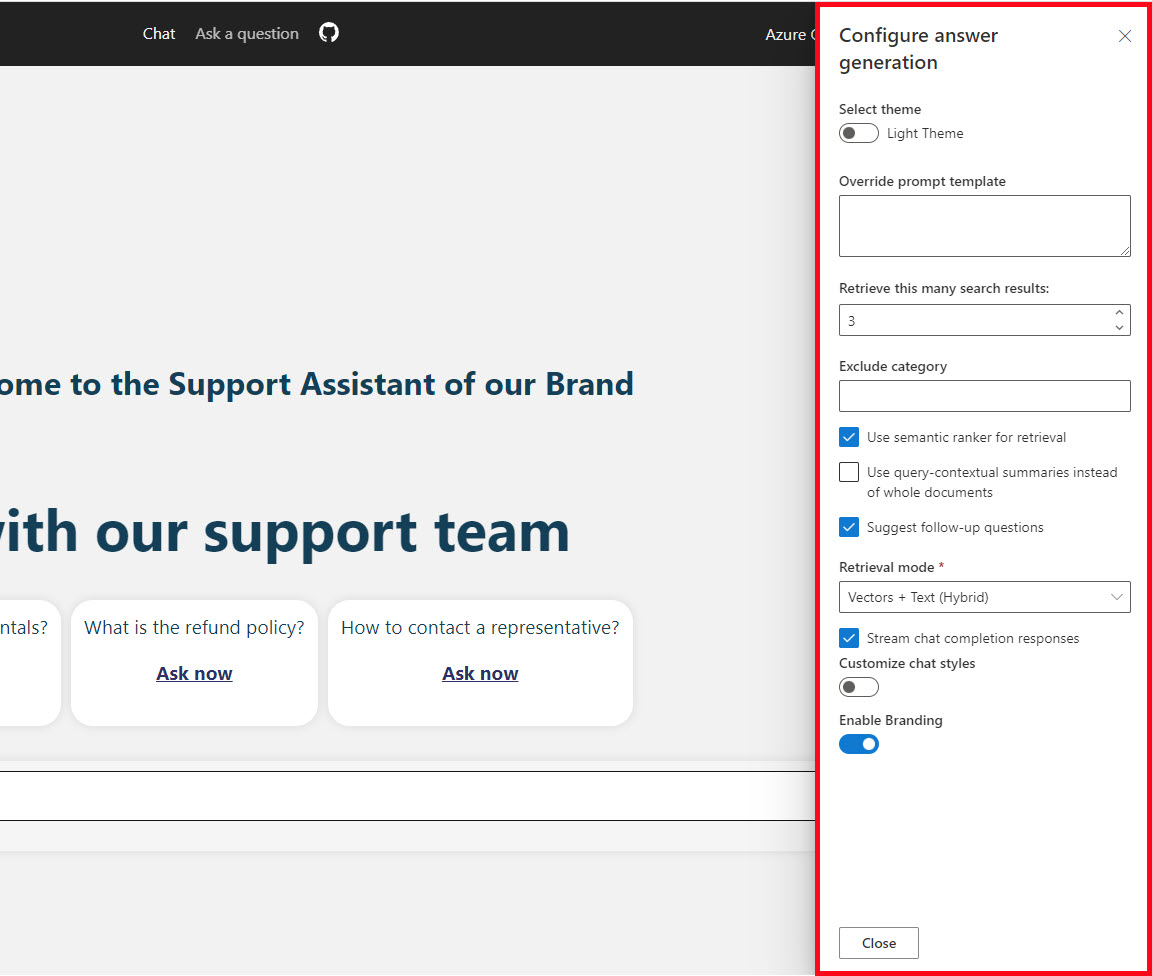
There is a Panel in both the Chat.tsx and OneShot.tsx that provides the UI layout and data binding to the underlying model. Those underlying models are passed to the chat-component in order to provide the UI and chat customizations the web components.
A look at the Backend
The backend API is provided by the logic in the search directory.
search
The search API uses the fastify framework to provide the chat endpoints used by the frontend.
Things to point out in the API root.ts file
Streaming the chat reply
This may be of interest if you are curious how to handle a streaming result coming back from OpenAI, the logic is in both the chat and ask function:
        if (stream) {
          const buffer = new Readable();
          // Dummy implementation needed
          buffer._read = () => {};
          reply.type('application/x-ndjson').send(buffer);

          const chunks = await chatApproach.runWithStreaming(messages, (context as any) ?? {});
          for await (const chunk of chunks) {
            buffer.push(JSON.stringify(chunk) + '\n');
          }
          // eslint-disable-next-line unicorn/no-null
          buffer.push(null);
        }
There is also important logic in the chat-component.ts file (in the chat-component directory) and the /core/parser/index.ts in the parseStreamedMessages() function that deals with parsing the streamed message so it can get written to the UI.
Selecting the approach for the chat interaction
The approach field is passed to the search API from the UI. This is the Chat vs. Ask as Question choices mentioned in UI section - the chat function uses the possible approaches configured in fastify.approaches.chat in /lib/plugins/approaches.ts file to determine how to run the chat request. The ask function uses the fastify.approaches.ask in that file (shown below):
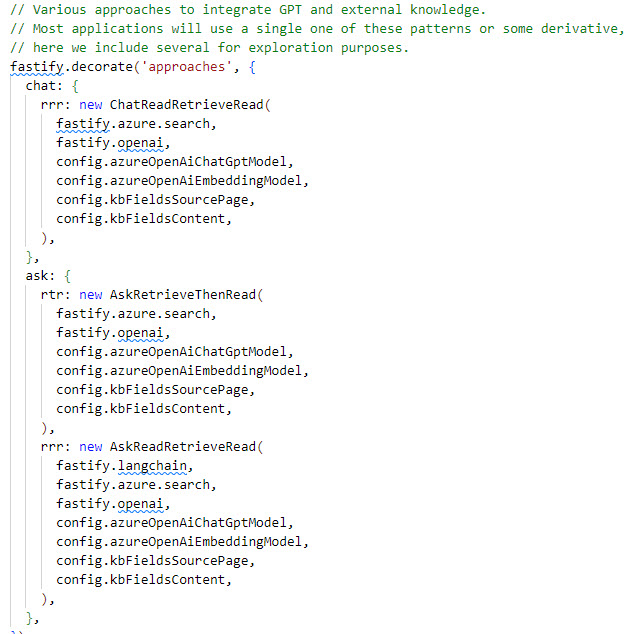
Approaches
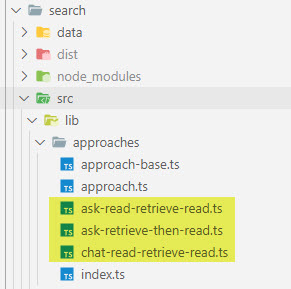
The most interesting logic in the search code is the code for the different approaches:
Chat-read-retrieve-read (rrr)
This is the only approach used on the Chat option in the UI. This approach uses a couple of calls to OpenAI. The flow is basically:
- Get an optimized keyword search query from OpenAI
- Search the documents
- Take the result from OpenAI and some prompt templates plus the chat history, to then again ask OpenAI the question with the previous context.
Ask-retrieve-then-read (rtr)
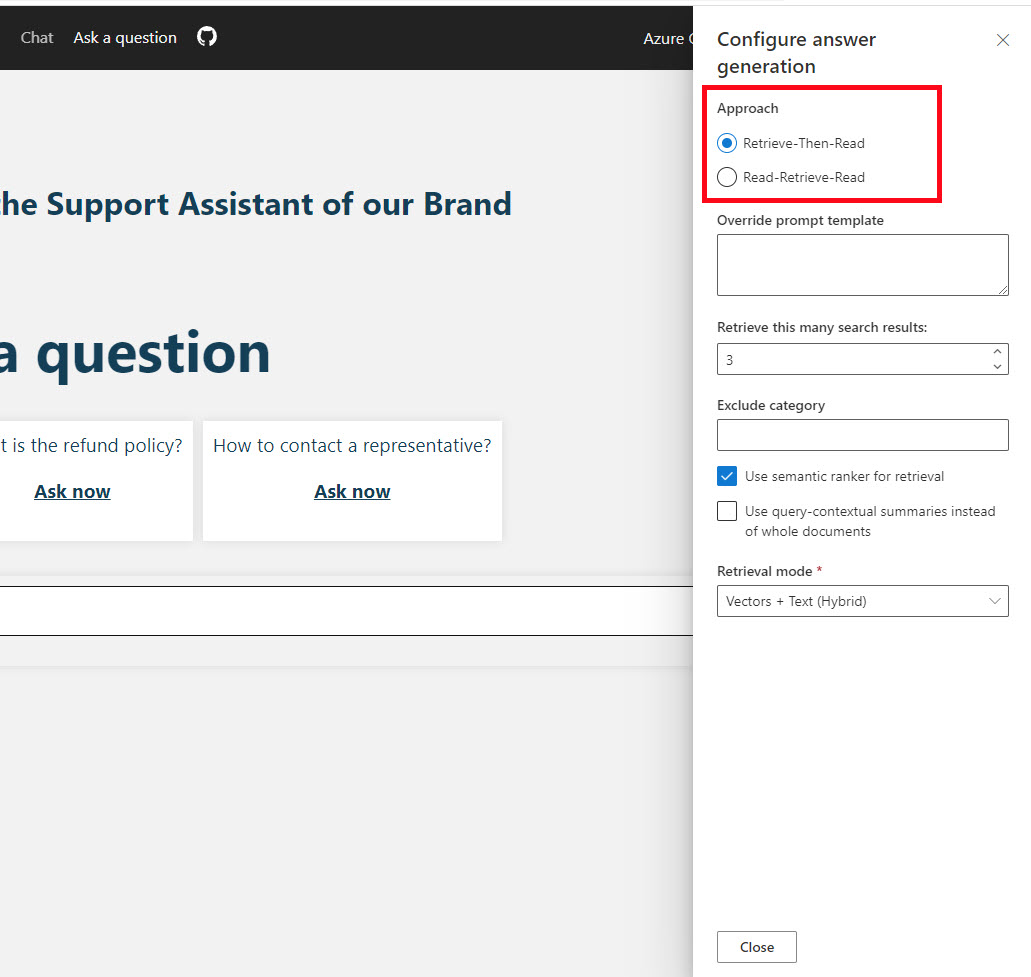
This is not the default out of the box value passed in the <chat-component data-approach="..."> in the OneShot.tsx React code. In order to use it, you will need to change the value to rtr.
NOTE: As of 2/19/2024, it looks like there is a bug in the demo, since there is a place to change the approach in the Developer Settings panel - but it does not seem to be bound to the web component yet. This may be fixed in the future:
This is about as simple as an interaction for chat completion can get, it searches the documents, then builds the prompts with some prepared prompt templates and sends the context to OpenAI and returns the results.
Ask-read-retrieve-read (rrr)
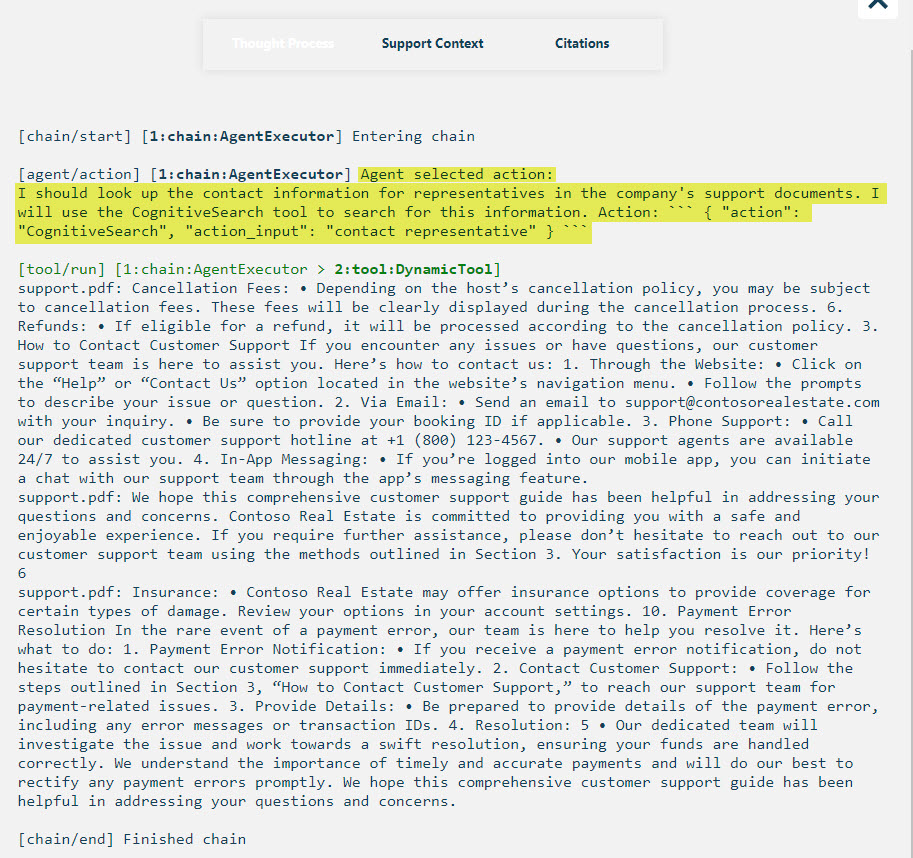
This is the interesting one - it uses LangChain. This approach uses two tools:
- DynamicTool - which calls the search service to find related documents
- EmployeeInfoTool - which looks at the
/data/employee-info.csvfile for answering questions.
Its best to play around with the demo code to better understand how it works - but here are a couple of examples.
Question: How to contact a representative?
Answer:
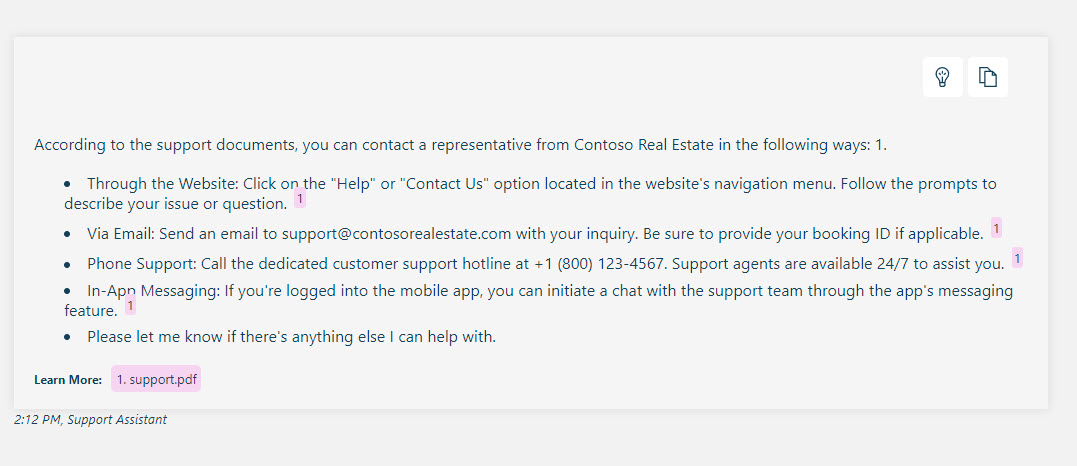
More interesting is the Thought Process (the little light bulb button at the top of the answer). The agent decided it should call the DynamicTool to search for documents.
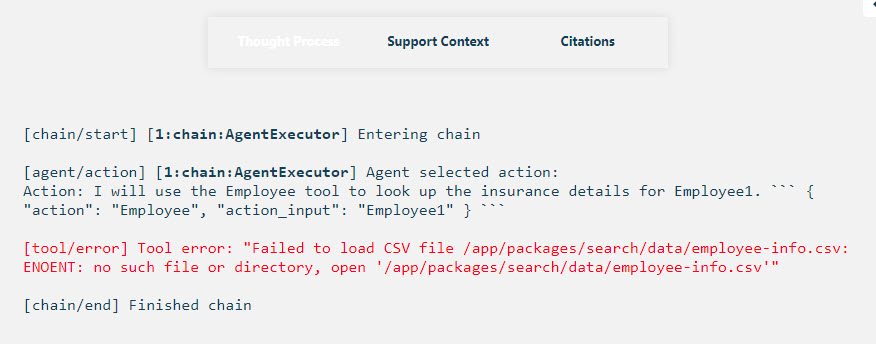
In this next question I want to trigger the EmployeeInfoTool that looks at the csv file. The wording is a little odd, but the goal is to get the input to be “Employee1” (if you look at the code you’ll see).
Question: I am Employee1 what insurance group do I belong?
Answer: (Running locally due to a bug mentioned below)

Thought Process:

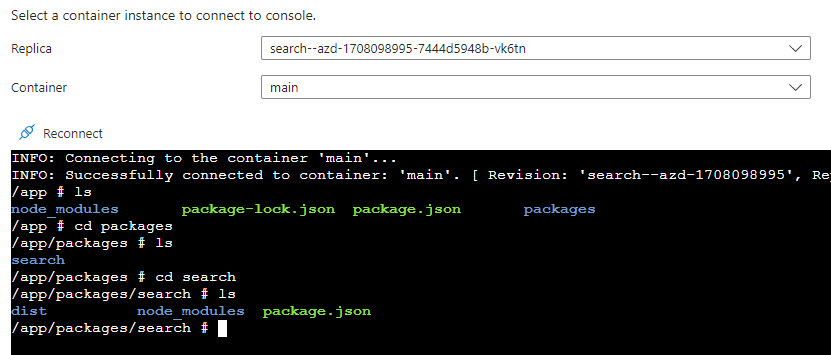
NOTE: As of 2/19/2024 there seems to be a bug in the deployed search container not having the data/employee-info.csv file in it. This may be fixed in the future.
How to get it up and running
Due to the application being deployed to an Azure Container App, a container will get built during the package phase this requires Docker Desktop to be running. If you don’t have it, you will need to install it.
The repository is designed to be built and deployed to Azure using the Azure Developer CLI (AZD), if you don’t have it installed you will need to install it. The AZD documentation is at: https://learn.microsoft.com/en-us/azure/developer/azure-developer-cli/reference
You will also need to be approved for the Azure OpenAI services on your Azure subscription before getting it up and running. Apply Here - it usually takes around 24 hours to get approved.
- Clone the repo to your local drive
- Start docker desktop (you will get an error like shown below if you don’t have it running when you get to the last step)

- Open VS Code and a PowerShell terminal (or open command line to demo’s root directory to run AZD)
- Run
azd auth loginand login to your Azure subscription that is approved for Azure OpenAI. - Run
azd up
You will need to choose the subscription and location (eastus or eastus2 have been good for me).
The whole process has been taking around 15 minutes to deploy for me.
Once the deployment is complete you should see a static web app url close to the bottom of the output in the terminal
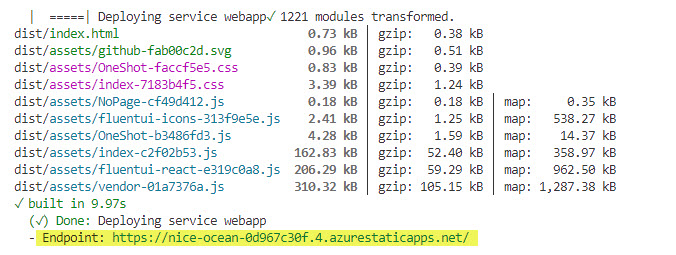
Navigate to that site to verify your demo deployed and is working.
NOTE: Do not forget these resources will be costing money
In order to remove everything, the best way is to run azd down --purge it will remove all resources and ask you to verify final deletion. You can delete the resource group but Azure OpenAI and Azure AI Document Intelligence all do a soft delete when you do that, so if you want to purge those resources you will need to manually do it - this is why azd down --purge is better and does take some time.
Points of Interest
These are some items in the demo that are RAG feature related and you may revisit later when you start creating your own RAG applications.
Storing vector embeddings in Azure AI Search
This demo uses Azure AI Search for storing the vector embeddings, content to be indexed, metadata about that content, perform a similarity search on the index, optionally perform a semantic search, etc. The search API uses the Azure SearchClient library to perform searches.
The Document loader item below has more information on interacting with the Azure Search index.
Chunking technique
The chunking technique used on the files is in the indexer/src/lib/util/document-processor.ts file. The default settings (shown below) look to be the same as the C# demo
const SENTENCE_ENDINGS = new Set(['.', '!', '?']);
const WORD_BREAKS = new Set([',', ';', ':', ' ', '(', ')', '[', ']', '{', '}', '\t', '\n']);
const MAX_SECTION_LENGTH = 1000;
const SENTENCE_SEARCH_LIMIT = 100;
const SECTION_OVERLAP = 100;
It also deals with html tables like the C# version. You may want to check out the document-processor.ts file to learn more.
Document loader
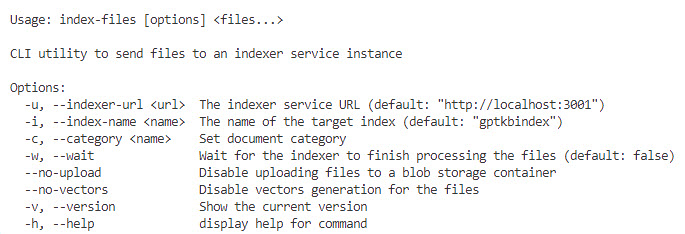
In this demo, the document loader is the indexer directory code. There is a CLI named index-files (called in the scripts/index-data.ps1) that interacts with an API to do the loading, parsing, embedding and adding of documents to the search index.
Here is the call from the index-data.ps1 file:

The usage for the index-files utlity:
The API uses Fastify and exposes these endpoints:
| URL | Method | Description |
|---|---|---|
| / | POST | Creates the :name index |
| /:name | DELETE | Deletes the :name index |
| /:name/files | POST | Uploads a file for indexing in the :name index |
| /:name/files/:filename | DELETE | Deletes a file :filename from the :name index |
The document loader will handle files with extensions .txt, .md and .pdf. It uses mozilla/pdfjs-dist for parsing the .pdf files.
NOTE: There is no UI in this demo (yet) to upload files to the indexer API, you will have to manually interact with the API using the
index-filesCLI if you want to add more files to the index.
Streaming chat completions
One common user experience feature this demo has is the option to stream the results as they come in from the server - instead of waiting until the full text is ready to show. This was mentioned above in the search section above.
OpenAI has more information on how to stream completions
LangChain agent
LangChain is a framework that helps abstract common functionality needed when building chat functionality (though it can be used for more than just chat applications). This demo can help you get introduced to it, though there is a lot more to it than what is used in the ask-read-retrieve-read.ts. I’ve included a couple of videos in the other resources section that I’ve found useful. LangChain sort of competes with Semantic Kernel (which was used in the C# demo
HTTP Protocol for AI Chat apps
This application uses the HTTP protocol for AI chat apps for the chat protocol. This may be useful if you find the need to change out backends for your chat applications.
Other resources
- Video: RAG Chat Web Components - Slides
- Video: Searching Enterprise data with Azure OpenAI & Azure Search in JavaScript
- Building ChatGPT-Like Experiences with Azure: A Guide to Retrieval Augmented Generation for JavaScript applications
- The LangChain Cookbook - Beginner Guide To 7 Essential Concepts
- The LangChain Cookbook Part 2 - Beginner Guide To 9 Use Cases
- LangChain Agents
Other related demos
If you have a comment please message me @haleyjason on twitter/X.