This is the sixth part of the eShopSupport Series which covers the details of the eShopSupport GitHub repository.
CustomerWebUI Project
The CustomerWebUI project is a Blazor application used to capture support ticket information from customers. It is one of the two user interface projects in the solution that highlight how to adding some AI functionality into business applications can be useful. The project is located under the src folder:
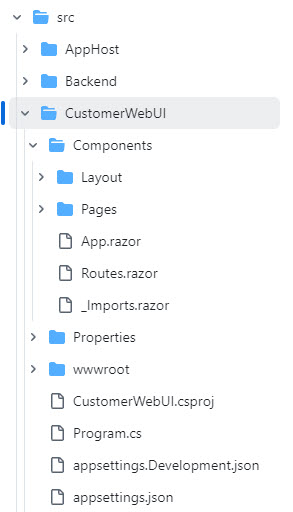
In this entry I’ll cover the functionality the web application provides, a few things I found interesting and some thoughts on improvements.
What does it do?
Steve Sanderson opens the CustomerWebUI about 45 minutes into his NDC talk “How to add genuinely useful AI to your webapp (not just chatbots)” when he is showing the ticket classification logic performed by the Python project. The application is used to create new support tickets which are then viewed by the StaffWebUI project. Both utilize AI in various places.
In order to open the CustomerWebUI you need to start the AppHost project to get the Aspire Dashboard up and running.
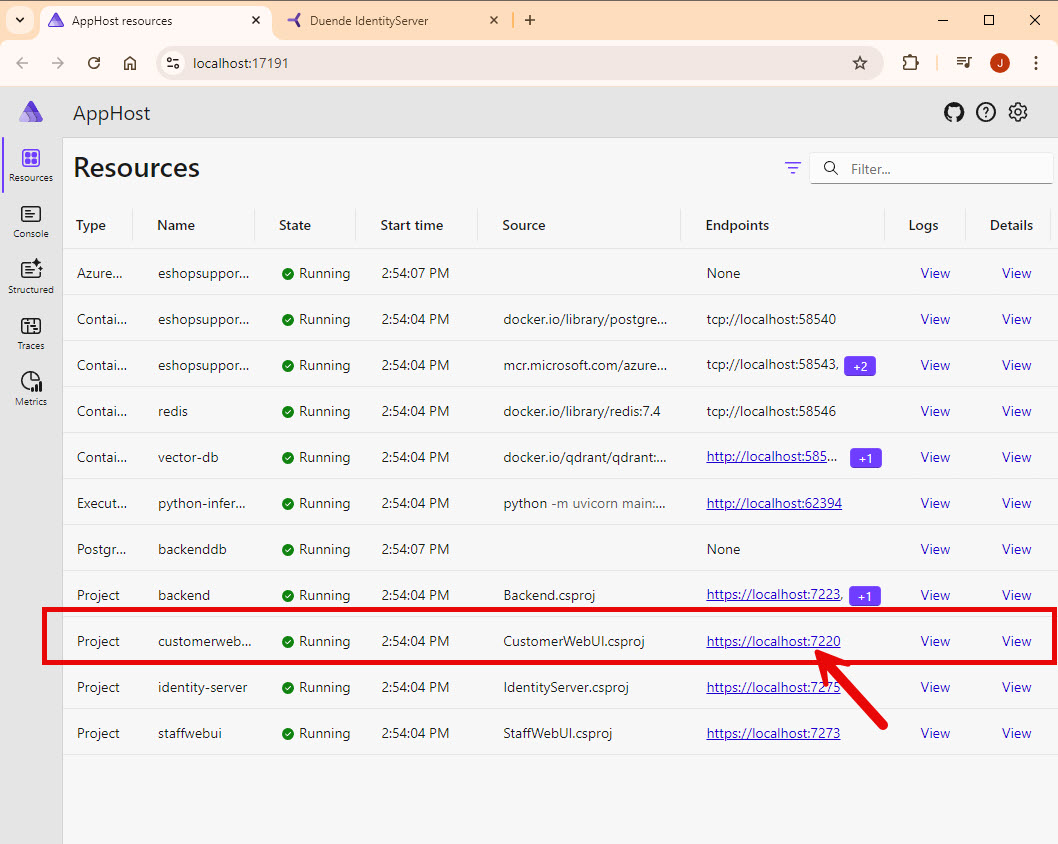
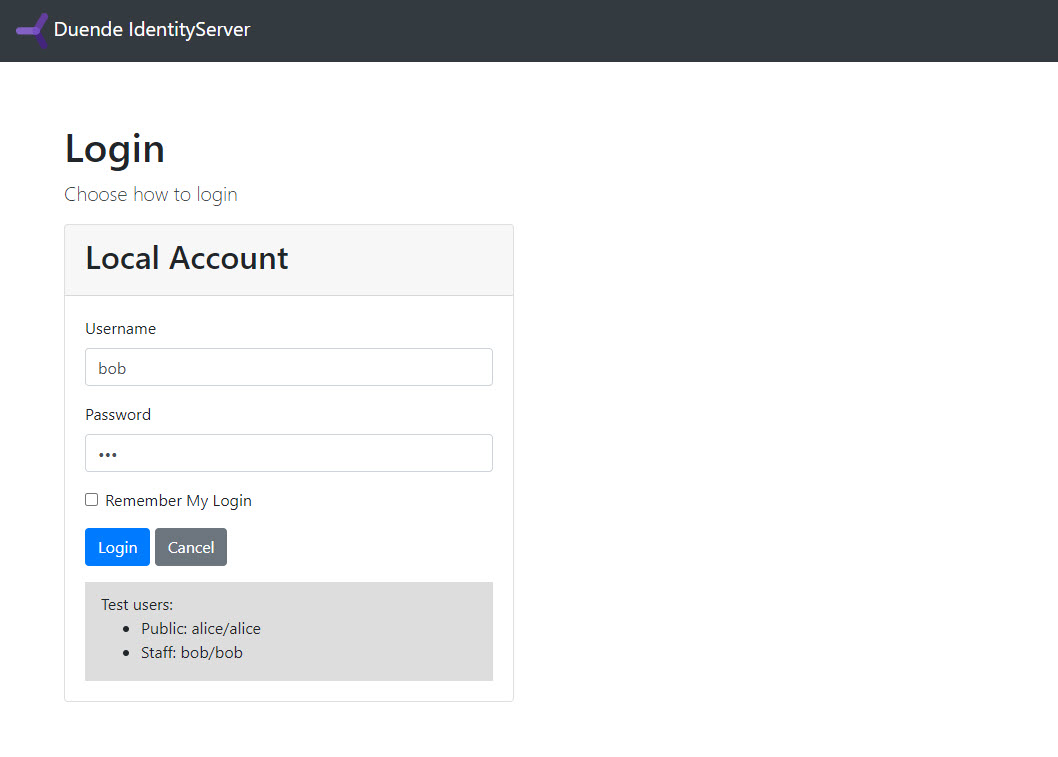
Find the CustomerWebUI in the resource list and click on the hyperlink to launch the application. This will take you to the login page. Use the bob for the username and bob for the password to login.
NOTE: I will be covering Identity Server in a future blog post
Once you are logged in, you are navigated to the ticket list page (/support)
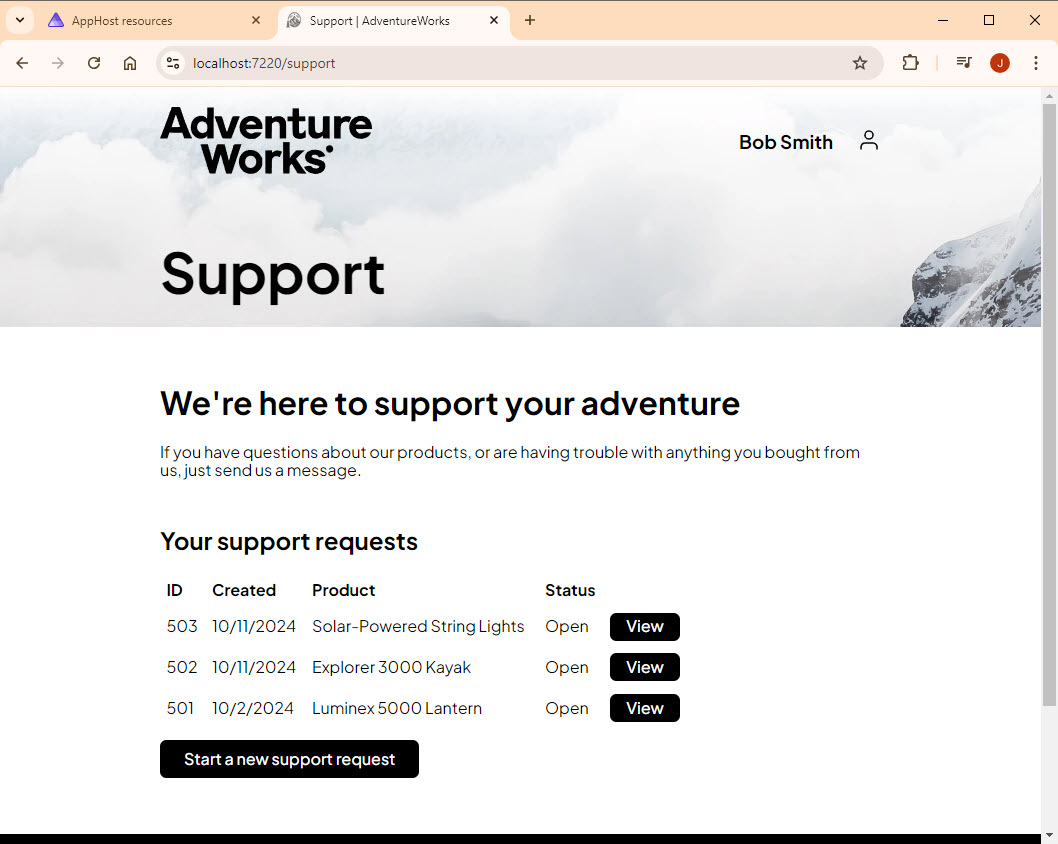
TicketList.razor
The logic for the TicketList.razor is a Blazor component in the /Components/Pages/Support directory:
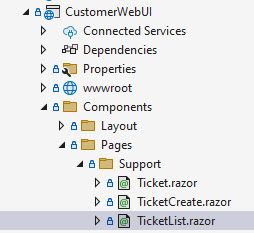
The @page on the first line is what maps the /support route to the component. The second line enables stream rendering which provides a better user experience in returning a list of items on a page.
@page "/support"
@attribute [StreamRendering]
@inject CustomerBackendClient Backend
@using Microsoft.AspNetCore.Authorization
@using eShopSupport.Backend.Data
@using eShopSupport.ServiceDefaults.Clients.Backend

<PageTitle>Support | AdventureWorks</PageTitle>
<SectionContent SectionName="page-header-title">Support</SectionContent>

<div class="page-gutters">
    <h1>We're here to support your adventure</h1>
    <p>
        If you have questions about our products, or are having
        trouble with anything you bought from us, just send us a message.
    </p>

    @if (tickets is null)
    {
        <p>Loading...</p>
    }
    else if (!tickets.Any())
    {
        <a class="start-button" href="support/new">Get started</a>
    }
    else
    {
        <h2>Your support requests</h2>

        <table>
            <thead>
                <tr>
                    <th>ID</th>
                    <th>Created</th>
                    <th>Product</th>
                    <th>Status</th>
                    <th></th>
                </tr>
            </thead>
            <tbody>
                @foreach (var ticket in tickets)
                {
                    <tr>
                        <td>@ticket.TicketId</td>
                        <td>@ticket.CreatedAt.ToShortDateString()</td>
                        <td>@ticket.ProductName</td>
                        <td>@ticket.TicketStatus</td>
                        <td>
                            <a class="action-button" href="support/tickets/@ticket.TicketId">View</a>
                        </td>
                    </tr>
                }
            </tbody>
        </table>

        <a class="start-button" href="support/new">Start a new support request</a>
    }
</div>
If no tickets are populated yet, the message Loading… is shown. If there aren’t any tickets, a Get Started button is shown to take you to the /support/new route. Otherwise an html table is built showing the existing tickets, with a Start a new support request button at the bottom to allow the user to open a new request.
The server side logic only loads the list of tickets:
    [CascadingParameter]
    public HttpContext HttpContext { get; set; } = default!;

    IEnumerable<ListTicketsResultItem>? tickets;

    protected override async Task OnInitializedAsync()
    {
        tickets = (await Backend.ListTicketsAsync()).Items;
    }
If you click on the button to go to /support/new, the TicketCreate component will be loaded.
TicketCreate.razor
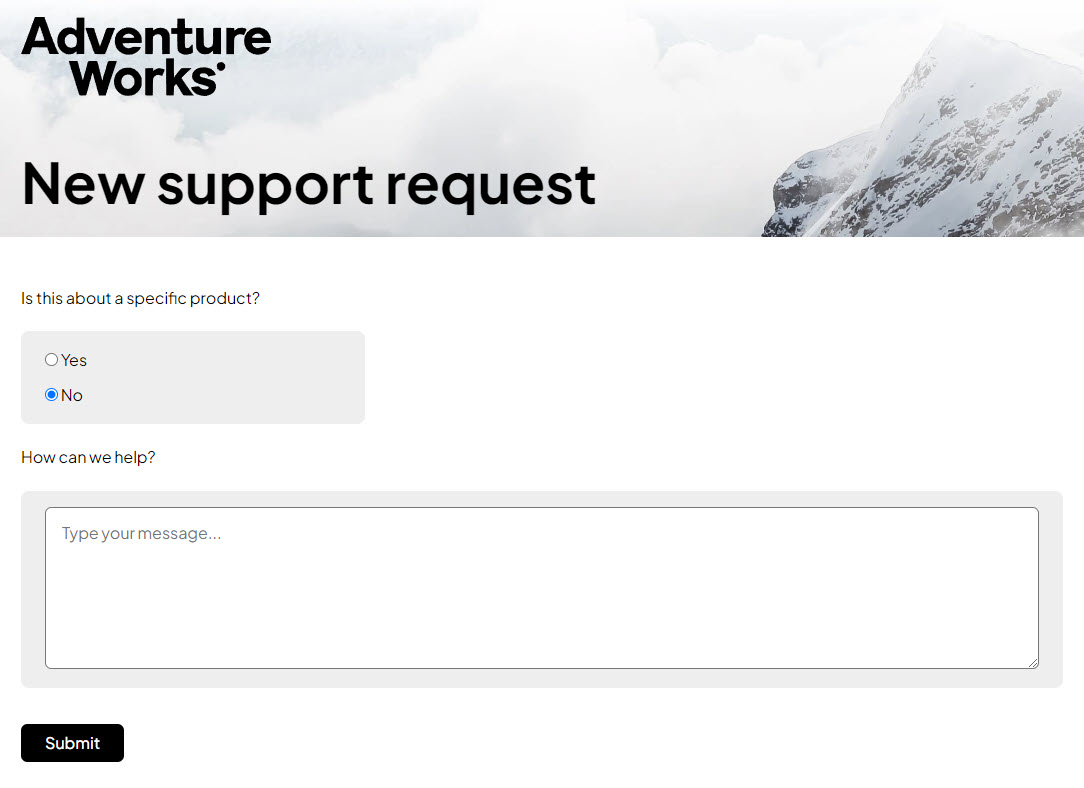
TicketCeate.razor has two purposes:
-
Capture a support request that is not about a specific product
-
Capture a support request about a specific product
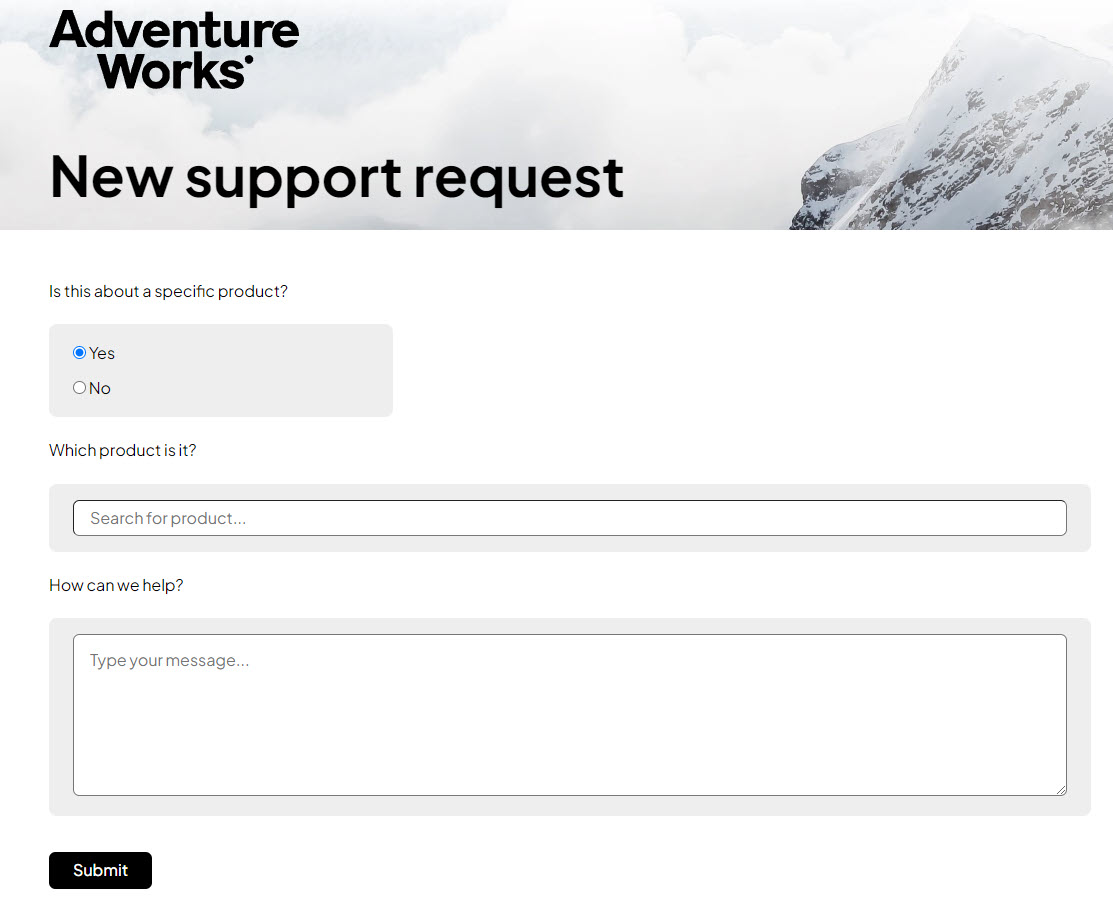
Both scenarios are captured with a single form by using a radio button to determine which controls to hide and show. As you can see in the html below, the radio button sets the IsSpecificProduct property which is bound to the underlying input:
@page "/support/new"
@implements IValidatableObject
@inject CustomerBackendClient Backend
@inject NavigationManager Nav
@using System.ComponentModel.DataAnnotations
@using Microsoft.AspNetCore.Components.Authorization
@using SmartComponents
@using System.Security.Claims
@using eShopSupport.ServiceDefaults.Clients.Backend

<PageTitle>Support | AdventureWorks</PageTitle>
<SectionContent SectionName="page-header-title">New support request</SectionContent>

<EditForm class="page-gutters" FormName="support" Model="@this" OnValidSubmit="@HandleSubmitAsync">
    <DataAnnotationsValidator />

    <p>Is this about a specific product?</p>
    <div class="answer is-specific-product">
        <InputRadioGroup @bind-Value="@IsSpecificProduct">
            <p>
                <label>
                    <InputRadio Value="@true" />
                    Yes
                </label>
            </p>
            <p>
                <label>
                    <InputRadio Value="@false" />
                    No
                </label>
            </p>
        </InputRadioGroup>
    </div>

    <div class="choose-product">
        <p>Which product is it?</p>
        <div class="answer">
            <SmartComboBox Url="api/product-search" @bind-Value="@ProductName" placeholder="Search for product..." />
            <ValidationMessage For="@(() => ProductName)" />
        </div>
    </div>

    <div class="message">
        <p>How can we help?</p>
        <div class="answer">
            <InputTextArea @bind-Value="Message" placeholder="Type your message..." />
            <ValidationMessage For="@(() => Message)" />
        </div>
    </div>

    <p class="submit">
        <button type="submit">Submit</button>
    </p>
</EditForm>
When you interact with the UI and look at the code above, you may be wondering how the product div is shown and hidden. That is in the TicketCreate.razor.css file starting on line 30:
.choose-product, .submit, .message {
    display: none;
}

form:has(.is-specific-product input[value=True]:checked) .choose-product {
    display: block;
}

form:has(.is-specific-product input:checked) .message, form:has(.is-specific-product input:checked) .submit {
    display: block;
}
The default for the <div class="choose-product"> is to be hidden, but when the radio button is set to True, the style changes to show the div.
The server side code contains the properties for databinding and validating the user input, along with a call to the Backend.CreateTicketAsync(new(ProductName, Message!)); method to create a new ticket. Once the ticket is created, the NavigationManager is used to navigate back to the /support url.
[SupplyParameterFromForm, Required(ErrorMessage = "Please answer this question")]
public bool? IsSpecificProduct { get; set; }

[SupplyParameterFromForm]
public string? ProductName { get; set; }

[SupplyParameterFromForm, Required(ErrorMessage = "Please enter your support request here")]
public string? Message { get; set; }

[CascadingParameter]
public HttpContext HttpContext { get; set; } = default!;

public IEnumerable<ValidationResult> Validate(ValidationContext validationContext)
{
    if (IsSpecificProduct == true && string.IsNullOrWhiteSpace(ProductName))
    {
        yield return new ValidationResult("Please specify the product", new[] { nameof(ProductName) });
    }
}

async Task HandleSubmitAsync()
{
    await Backend.CreateTicketAsync(new(ProductName, Message!));
    Nav.NavigateTo("support");
}
The interesting part of this component is the usage of the SmartComboBox:
<SmartComboBox Url="api/product-search" @bind-Value="@ProductName" placeholder="Search for product..." />
Steve Sanderson introduces the Smart Components in his video about four minutes in where he mentions them as being a set of samples that allow you to add AI at the UI layer.
If you’ve done web development before, you’ve probably used a component vendor’s ComboBox that allows you to perform type ahead searching by either a “starts with” or “contains” to narrow down the list of items. This SmartComboBox use a semantic search filter. For example, when I type in “kayak” it not only shows the kayak products but also a related paddle product:

The data source for the combo box is wired up in the Program.cs on Line 65:
app.MapSmartComboBox("api/product-search", async request =>
{
    var backend = request.HttpContext.RequestServices.GetRequiredService<CustomerBackendClient>();
    var results = await backend.FindProductsAsync(request.Query.SearchText);
    return results.Select(r => $"{r.Model} ({r.Brand})");
});
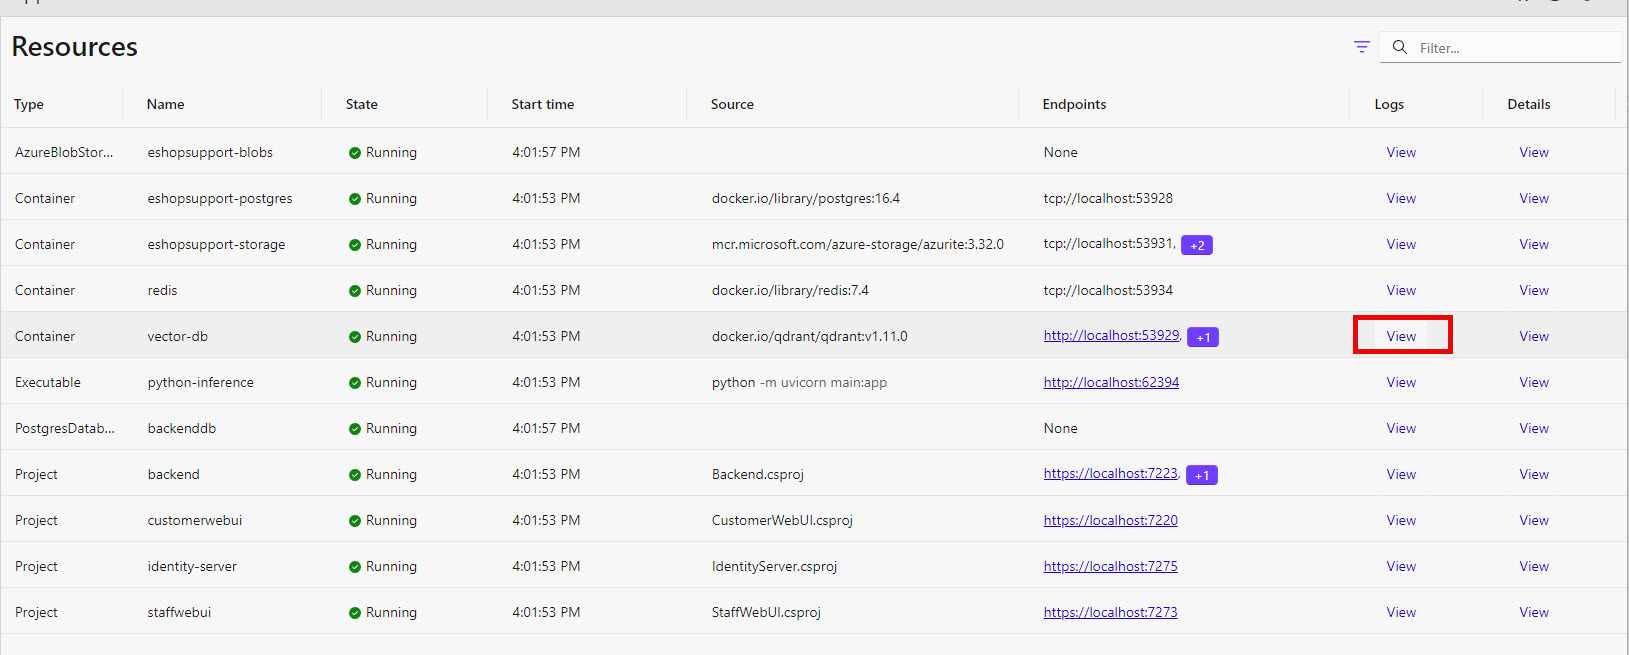
If you go to the Aspire Dashboard and find the vector-db resource, then select the Logs View button
You will see the search performed by the SmartComboBox makes does a semantic search against the qdrant vector db:
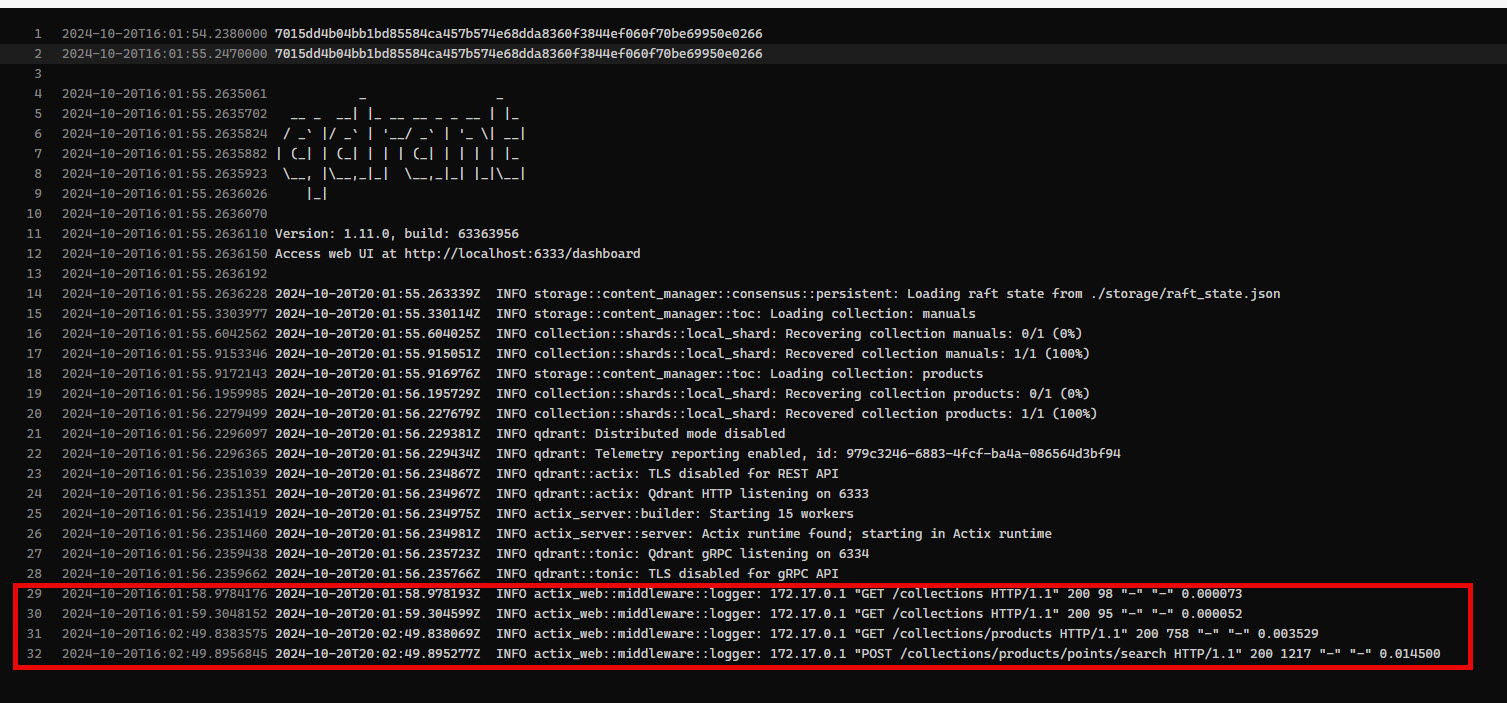
So to sum it up, the SmartComboBox provides a UI component for a similarity search in a vector database.
Ticket.razor
The last page to mention is the Ticket.razor page. This is the page you navigate to when you select a View button on the /support route in the list of tickets.
The purpose of this page is to show the support ticket conversation messages between the logged in user and the support staff. You can also add additional messages to the conversation for the support staff to address with the StaffUI application.
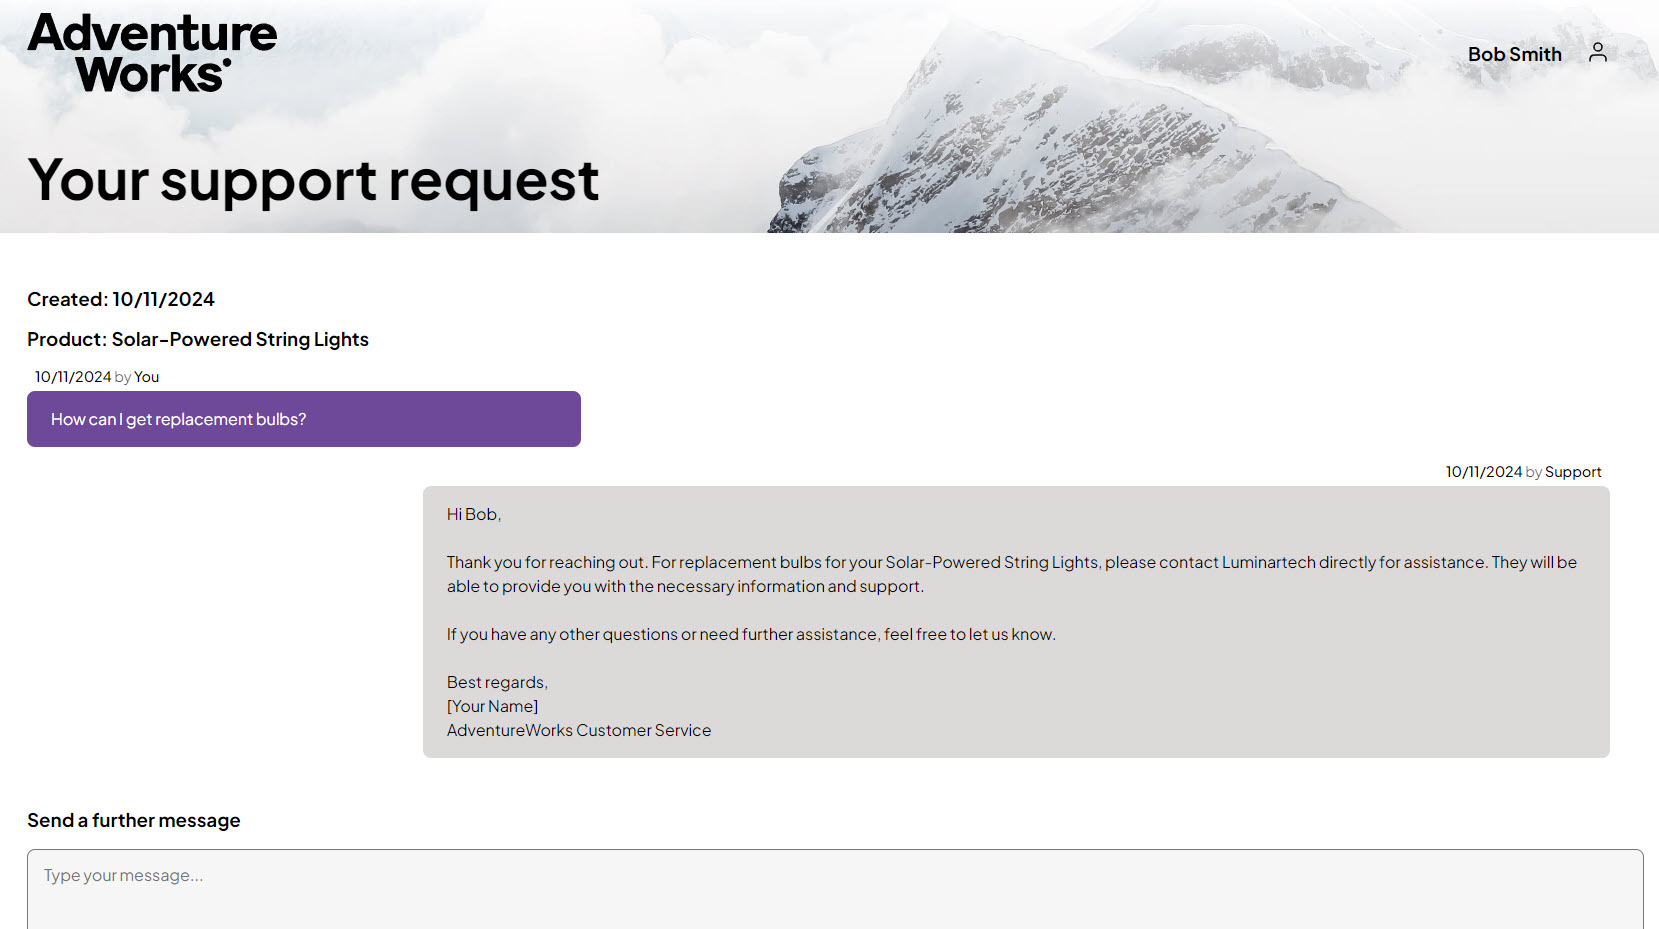
If you look at the html portion of the Blazor component, you can see it is typical Blazor code that builds the html for the page and user interaction:
@page "/support/tickets/{TicketId:int}"
@inject CustomerBackendClient Backend
@inject NavigationManager Nav
@implements IValidatableObject
@using System.ComponentModel.DataAnnotations
@using eShopSupport.ServiceDefaults.Clients.Backend

<PageTitle>Support | AdventureWorks</PageTitle>
<SectionContent SectionName="page-header-title">Your support request</SectionContent>

<div class="page-gutters">
    @if (TicketDetails is { } ticket)
    {
        <h3>Created: @ticket.CreatedAt.ToShortDateString()</h3>

        @if (ticket.ProductModel is { } productModel)
        {
            <h3>Product: @productModel</h3>
        }

        <div class="messages">
            @foreach (var message in ticket.Messages)
            {
                <div class="message @(message.IsCustomerMessage ? "customer" : "support")">
                    <div class="message-metadata">
                        <span class="timestamp">@message.CreatedAt.ToShortDateString()</span>
                        <span class="filler">by</span>
                        <span class="sender">@(message.IsCustomerMessage ? "You" : "Support")</span>
                    </div>
                    <div class="message-text">@message.MessageText</div>
                </div>
            }
        </div>

        <div class="actions">
            @if (ticket.TicketStatus == TicketStatus.Closed)
            {
                <p>
                    This support request is now <strong>closed</strong>. If you need any further help, please
                    <a href="support/new">create a new support request</a>.
                </p>
            }
            else
            {
                <h3>Send a further message</h3>
                <EditForm Model="@this" FormName="ticket" OnValidSubmit="@SubmitAsync" Enhance>
                    <DataAnnotationsValidator />
                    <InputTextArea @bind-Value="NewMessage" placeholder="Type your message..." />
                    <ValidationMessage For="@(() => NewMessage)" />

                    <p>If you're happy with the answer, or if you no longer need support, please close this request using the button below.</p>

                    <p>
                        <button type="submit" name="submitter" value="@CloseAction">Close</button>
                        <button type="submit" name="submitter" value="@SendAction">Send</button>
                    </p>
                </EditForm>
            }
        </div>
    }
</div>
The Enhance on the edit form is for Blazor Enhanced Form handling which will post the form without reloading the page.
Another interesting point in the html code is the Close and Send buttons both have the same name, that is a web form pattern I haven’t seen in quite awhile.
The server side code contains the properties for capturing the input, validation logic and data saving API calls. The Ticket Details are populated from a call to the Backend.GetTicketDetailsAsync() in OnInitializedAsync.
const string CloseAction = "close";
const string SendAction = "send";

[Parameter]
public int TicketId { get; set; }

[CascadingParameter]
public HttpContext HttpContext { get; set; } = default!;

[SupplyParameterFromForm]
public string? Submitter { get; set; }

[SupplyParameterFromForm]
public string? NewMessage { get; set; }

TicketDetailsResult? TicketDetails { get; set; }

protected override async Task OnInitializedAsync()
{
    TicketDetails = await Backend.GetTicketDetailsAsync(TicketId);
}

public IEnumerable<ValidationResult> Validate(ValidationContext validationContext)
{
    if (Submitter == SendAction && string.IsNullOrWhiteSpace(NewMessage))
    {
        yield return new ValidationResult("Please type a message", new[] { nameof(NewMessage) });
    }
}

async Task SubmitAsync()
{
    if (TicketDetails!.TicketStatus != TicketStatus.Open)
    {
        Nav.NavigateTo("/support");
    }

    var ticketId = TicketDetails.TicketId;
    if (!string.IsNullOrWhiteSpace(NewMessage))
    {
        await Backend.SendTicketMessageAsync(ticketId, new(NewMessage));
    }

    if (Submitter == CloseAction)
    {
        await Backend.CloseTicketAsync(ticketId);
    }

    // Reload the ticket data to update the UI
    Nav.Refresh();
}
NOTE: I did not cover other boilerplate Blazor files or the Program.cs file
Dependencies
The CustomerWebUI project has a couple package references:
- SmartComponents.AspNetCore - used for the SmartComboBox
- Microsoft.AspNetCore.Authentication.OpenIdConnect - used in the Program.cs file to configure the authentication to Identity Server
The SmartComboBox also uses the qdrant vector database in the solution - I’ll cover that more when I detail the Backend project.
How to set it up
The CustomerWebUI is a project in the Aspire AppHost:
var customerWebUi = builder.AddProject<CustomerWebUI>("customerwebui")
    .WithReference(backend)
    .WithEnvironment("IdentityUrl", identityEndpoint);
Once you have the Aspire AppHost running, you will be able to click on the endpoint url for the CustomerWebUI to launch the application:

Points of Interest
These are some points in the code base that I found interesting and will be revisiting when writing my own code. These things are the reason I do these code review blog posts.
Blazor usage
There are a few Blazor features used in this application that I want to take note of for future reference:
- Usage of
<SectionOutlet>(in HeaderBar.razor) and<SectionContent>(used in Ticket.razor for example) - StreamRendering usage in TicketList.razor
- Enhanced Form handling in the EditForm in Ticket.razor
Use of Identity Server for authentication
I did not cover the Program.cs file, maybe I’ll update this entry in the future to cover it. However, until then, I want to note the usage of Identity Server for authentication. This may be useful for a project I am working on soon.
JsonWebTokenHandler.DefaultInboundClaimTypeMap.Remove("sub");

builder.Services.AddAuthorization();
builder.Services.AddAuthentication(options =>
{
    options.DefaultScheme = CookieAuthenticationDefaults.AuthenticationScheme;
    options.DefaultChallengeScheme = OpenIdConnectDefaults.AuthenticationScheme;
})
    .AddCookie()
    .AddOpenIdConnect(options =>
    {
        options.SignInScheme = CookieAuthenticationDefaults.AuthenticationScheme;
        options.Authority = builder.Configuration["IdentityUrl"];
        options.ClientId = "customer-webui";
        options.ClientSecret = "customer-webui-secret";
        options.ResponseType = "code";
        options.SaveTokens = true;
        options.GetClaimsFromUserInfoEndpoint = true;
        options.TokenValidationParameters.NameClaimType = "name";

        options.Scope.Clear();
        options.Scope.Add("openid");
        options.Scope.Add("profile");
    });
Usage of SmartComboBox
The usage of the SmartComboBox is also important, since it is a new component and the more samples you have to review, the more likely it is you can use it in multiple projects.
The Blazor component:
<SmartComboBox Url="api/product-search" @bind-Value="@ProductName" placeholder="Search for product..." />
Important lines in the Program.cs for configuring:
...
builder.Services.AddSmartComponents();
...
app.MapSmartComboBox("api/product-search", async request =>
{
    var backend = request.HttpContext.RequestServices.GetRequiredService<CustomerBackendClient>();
    var results = await backend.FindProductsAsync(request.Query.SearchText);
    return results.Select(r => $"{r.Model} ({r.Brand})");
});
Thoughts on Improvements
This section is more or less to keep the same outline as I’ve used for the other eShopSupport blog entries - there is not much to improve on with this project.
Additional Navigation
This is a small user experience thing I noticed - I often found I wanted to navigate back to the ticket list page, but there isn’t any links to do so besides the logo or hitting the browser back button.
Validation on TicketCreate
I couldn’t get the validation to fail with the messages in the code for the TicketCreate page if I didn’t select a product and didn’t add a message. It only shows if I add a message. Seemed odd to me.
Other Resources
- eShopSupport Github
- How to add genuinely useful AI to your webapp (not just chatbots)
- Smart Components
- qdrant documentation
If you have a comment, please message me @haleyjason on twitter/X.