Like my last post (Quickstart: Container Apps using Bicep), this post is a supplement to the existing Azure Container Apps docs and provides a Bicep walkthrough to getting started.
Quickstart: Deploy an existing container image to Container Apps using Bicep
Azure Container Apps is a serverless platform to run and orchestrate your container applications.
In this quickstart, you’ll use Bicep to create a Container Apps environment with an existing container image stored in an Azure Container Registry. If you have not used Bicep yet or want to learn more about what it can do, I recommend going through the Fundamentals of Bicep learning path to get you started.
Prerequisites
- An Azure account with an active subscription. If you don’t have one, you can create one for free.
- Azure CLI
- Bicep tools
- Git (optional and only needed with Option 2: Create an Image below)
Setup
First you’ll need to sign in to Azure using the CLI (I typically use the device code option but it may not be necessary for you). Run the command below and follow the prompts to get logged into your account.
az login --use-device-code
If you haven’t used your Azure CLI installation for awhile, you may want to make sure it is up-to-date before continuing on. You can do this by running the following:
az upgrade
Also if you haven’t used Bicep for awhile, you may way want to make sure it is also up-to-date by running:
az bicep upgrade
If you haven’t already installed the Azure Container Apps extension, you will need to run the following command:
az extension add --name containerapp
And if you haven’t registered the Microsoft.App namespace, you can do so by running:
az provider register --namespace Microsoft.App
Run the following in order to set the environment variables we’ll use later:
RESOURCE_GROUP="my-container-apps"
LOCATION="eastus2"
CONTAINERAPP_NAME="my-container-app"
CONTAINERAPPS_ENVIRONMENT="my-environment"
Create the resource group used for resources in this quickstart:
az group create \
  -n $RESOURCE_GROUP \
  -l $LOCATION
Option 1: Use an Existing Container Image
If you have an existing container image in an Azure Container Registry, set the following variables the Container App will use to pull the image from the registry:
CONTAINER_IMAGE_NAME=<CONTAINER_IMAGE_NAME>
REGISTRY_LOGIN_SERVER=<REGISTRY_LOGIN_URL>
REGISTRY_USERNAME=<REGISTRY_USERNAME>
REGISTRY_PASSWORD=<REGISTRY_PASSWORD>
Option 2: Create an Image
If you don’t have a container image to use, I’ve modified the example from Tutorial: Build and deploy container images in the cloud with Azure Container Registry Tasks below to:
- Clone the sample repo from GitHub
- Create an Azure Container Registry (ACR)
- Build the sample container image and store in ACR
- Create an Azure Key Vault
- Create a service principal and store the credentials
- Populate the variables needed for the Bicep template
Before you begin, replace <registry-name> in the script below with at unique name for your container registry. The registry name can only contain lower case letters and needs to be between 5 and 50 characters in length. Then run the following command to set the variables:
ACR_NAME="<registry-name>"
AKV_NAME="$ACR_NAME-vault"
Clone the sample repo from GitHub
Next you’ll need to clone the Azure-Samples/acr-build-helloworld-node to a local directory. Run the following command to clone the repo:
git clone https://github.com/Azure-Samples/acr-build-helloworld-node.git
Create an Azure Container Registry (ACR)
Before you can have ACR build the container for you, you need to run the following command to create the Azure Container Registry we will use in this quickstart:
az acr create --resource-group $RESOURCE_GROUP --name $ACR_NAME --sku Standard --location $LOCATION
Build the sample container image and store in ACR
First, you’ll need to change to the directory the Dockerfile is in:
cd acr-build-helloworld-node/
Now that you have the code locally, you can use ACR to build the code and store the image for using in the Container App later by running the following command:
az acr build --registry $ACR_NAME --image helloacrtasks:v1 .
NOTE: you may get a message “The resource with name ‘acr name’ and type ‘Microsoft.ContainerRegistry/registries’ could not be found in subscription ‘subscription name’.” - If so, just wait a few seconds and try again.
This will take a little while to build the container. While it is building, your console should show the progress that looks something like this:

Create an Azure Key Vault
When we create the Container App later, we need to be able to access the ACR in order to pull the container image we just built. There are a couple of ways to do this: Admin user or Service Principal. We’ll create a Service Principal and store the username and password in Key Vault.
Create an Azure Key Vault using this command:
az keyvault create --resource-group $RESOURCE_GROUP --name $AKV_NAME
Create a service principal and store the credentials
Create a service principal and a secret to store its password in Key Vault by running this command:
az keyvault secret set \
  --vault-name $AKV_NAME \
  --name $ACR_NAME-pull-pwd \
  --value $(az ad sp create-for-rbac --name $ACR_NAME-pull --scopes $(az acr show --name $ACR_NAME --query id --output tsv) --role acrpull --query password --output tsv)
NOTE: This will be used as the REGISTRY_PASSWORD when creating the Container App.
Next store the service principal ID in another secret using this command:
az keyvault secret set \
    --vault-name $AKV_NAME \
    --name $ACR_NAME-pull-usr \
    --value $(az ad sp list --display-name $ACR_NAME-pull --query [].appId --output tsv)
NOTE: This will be used as the REGISTRY_USERNAME when creating the Container App.
Populate the variables needed for the Bicep template
You now have an image in an Azure Container Registry to use in a Container App. Run the following to populate the variables to use with the Bicep template next:
CONTAINER_IMAGE_NAME="$ACR_NAME.azurecr.io/helloacrtasks:v1"
REGISTRY_LOGIN_SERVER="$ACR_NAME.azurecr.io"
REGISTRY_USERNAME=$(az keyvault secret show --vault-name $AKV_NAME --name $ACR_NAME-pull-usr --query value -o tsv)
REGISTRY_PASSWORD=$(az keyvault secret show --vault-name $AKV_NAME --name $ACR_NAME-pull-pwd --query value -o tsv)
Create a Bicep template
You need to create a Bicep template containing all the resources for this quickstart:
- Log Analytics Workspace
- Container Apps Environment
- Container App
- Secret for ACR
Copy and save the following text into a file named aca-quickstart.bicep:
param location string = resourceGroup().location
param environmentName string
param appName string
param containerRegistry string
param containerRegistryUsername string

@secure()
param containerRegistryPassword string
param secrets array = [
  {
    name: 'acr-password'
    value: containerRegistryPassword
  }
]
var registrySecretRefName = 'acr-password'

param logAnalyticsWorkspaceName string = '${appName}-logs'
param containerImage string
param containerPort int = 80

resource logAnalyticsWorkspace 'Microsoft.OperationalInsights/workspaces@2020-03-01-preview' = {
  name: logAnalyticsWorkspaceName
  location: location
  properties: any({
    retentionInDays: 30
    features: {
      searchVersion: 1
    }
    sku: {
      name: 'PerGB2018'
    }
  })
}

resource environment 'Microsoft.App/managedEnvironments@2022-01-01-preview' = {
  name: environmentName
  location: location
  properties: {
    appLogsConfiguration: {
      destination: 'log-analytics'
      logAnalyticsConfiguration: {
        customerId: logAnalyticsWorkspace.properties.customerId
        sharedKey: logAnalyticsWorkspace.listKeys().primarySharedKey
      }
    }
  }
}

resource containerApp 'Microsoft.App/containerApps@2022-01-01-preview' = {
  name: appName
  location: location
  properties: {
    managedEnvironmentId: environment.id
    configuration: {
      secrets: secrets
      registries: [
        {
          server: containerRegistry
          username: containerRegistryUsername
          passwordSecretRef: registrySecretRefName
        }
      ]
      ingress: {
        external: true
        targetPort: containerPort
      }
    }
    template: {
      containers: [
        {
          image: containerImage
          name: appName
        }
      ]
    }
  }
}

output fqdn string = containerApp.properties.configuration.ingress.fqdn
Deploy resources
Next you need to navigate to the directory you saved the aca-quickstart.bicep file and run the following command:
az deployment group create \
  -g $RESOURCE_GROUP \
  -f ./aca-quickstart.bicep \
  -p environmentName=$CONTAINERAPPS_ENVIRONMENT \
  -p appName=$CONTAINERAPP_NAME \
  -p containerImage=$CONTAINER_IMAGE_NAME \
  -p containerRegistry=$REGISTRY_LOGIN_SERVER \
  -p containerRegistryUsername=$REGISTRY_USERNAME \
  -p containerRegistryPassword=$REGISTRY_PASSWORD \
  --query properties.outputs.fqdn.value
Once the resources have been deployed, the fully qualified domain name will be returned in the output. Mine looks like this:
Result
-----------------------------------------------------------------
my-container-app.grayrock-8a89bc72.eastus2.azurecontainerapps.io/
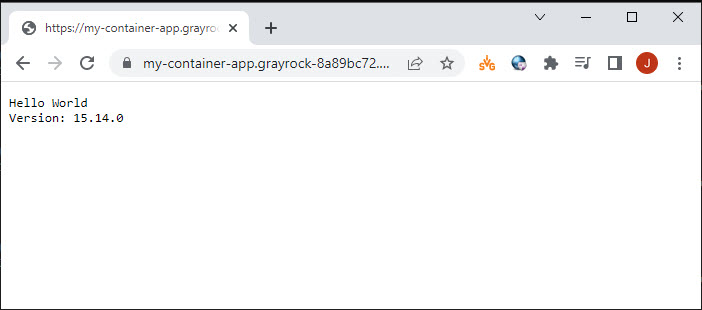
Verify
Copy the fully qualified domain name returned from the deployment and paste it into a browser to verify the app is running. The container app should like like this:
Clean up resources
When you are done, don’t forget to delete your resource group to remove all the resources created in this quickstart:
az group delete \
  -g $RESOURCE_GROUP