Last week I presented “A look at Azure Container Apps” to our local Azure user group. I was my first time presenting the topic and I’ll just say it wasn’t my best presentation (believe me - I’ve watched the whole recording). But anyway … during one of the demos a question came up about if it was easy to rollback a revision. I attempted to do perform a demo of how to do it, but the demo gods were not helping me last Thursday night.
Today at lunch I tried it again, and of course it worked fine. This is a walkthrough of how it should have worked last week.
Prerequisite for this walkthrough is to follow the steps in the Deploy your first container app (Azure Portal), but insert the following steps before the last Clean up resources step.
Rollback a container app revision
In the container app, select Revision management on the menu in order to view the current revisions list.

You should only see one revision in the list at this time. Next, click on the + Create new revision button in the upper left corner.

This will allow you to specify the details of a new revision. In this case we are focusing on the simple demo, so just add v2 for the revision Name / suffix to make it easy to determine which revision is created from this step. Next, click the Create button.

Once you click the Create button you will navigate back to revision management. Wait for 5 to 10 seconds and click the Refresh button at the top of the revisions listing (not the browser refresh button). Depending on how patient you are, you may need to click the refresh button a few times before the new revision shows.
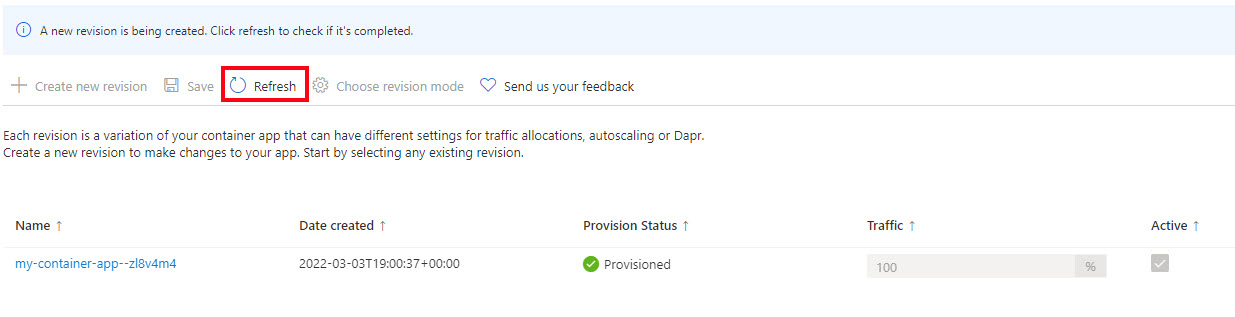
Once the new revision is available, you will see a revision ending in –v2 show up with 100% of the traffic going to it.

This is the point in the presentation last week, when someone asked “what if I need to rollback to the previous version quickly?”. In order to do that, you have a couple of choices that I know of (assuming you are using the portal):
Option 1 - Change the traffic quickly to go to the old revision
On the Revision management panel, change the traffic of the new revision to be 0 and the old revision to be 100, then click Save.
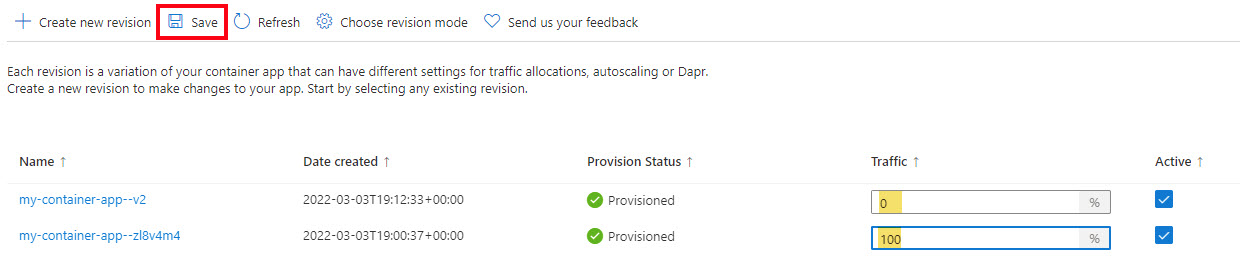
An advantage of this option, is the –v2 revision in still active and you are able to navigate to its url if you need to troubleshoot the revision without worrying about traffic going to it.
Option 2 - Change the traffic quickly to go to the old revision and deactivate the new version
On the Revision management panel, change the traffic of the new revision to be 0 and the old revision to be 100, uncheck the Active checkbox for the –v2 revision, then click Save.
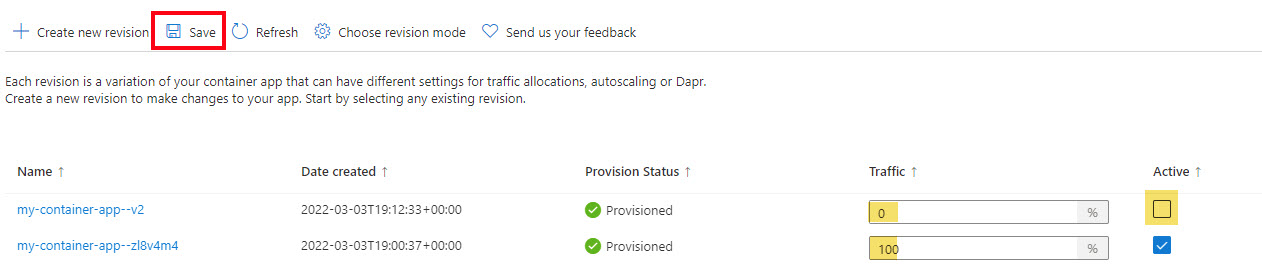
Once the settings are saved, you will now only have the old revision available for traffic - and you won’t be able to navigate to the new revision.

Next blog post I’ll detail how to use the Azure CLI to do (mostly) the same thing. You’ll see what I mean by mostly.
Summary
You can rollback a Container App revision by changing all the traffic to go to the old revision on the Revision management panel - just don’t forget to click Save. You have the option to deactivate the revision you don’t want traffic to go to. If you leave it active, you can get a url to navigate to only that revision in the revision panel’s Overview (even though no traffic will be going to it from the application url).